


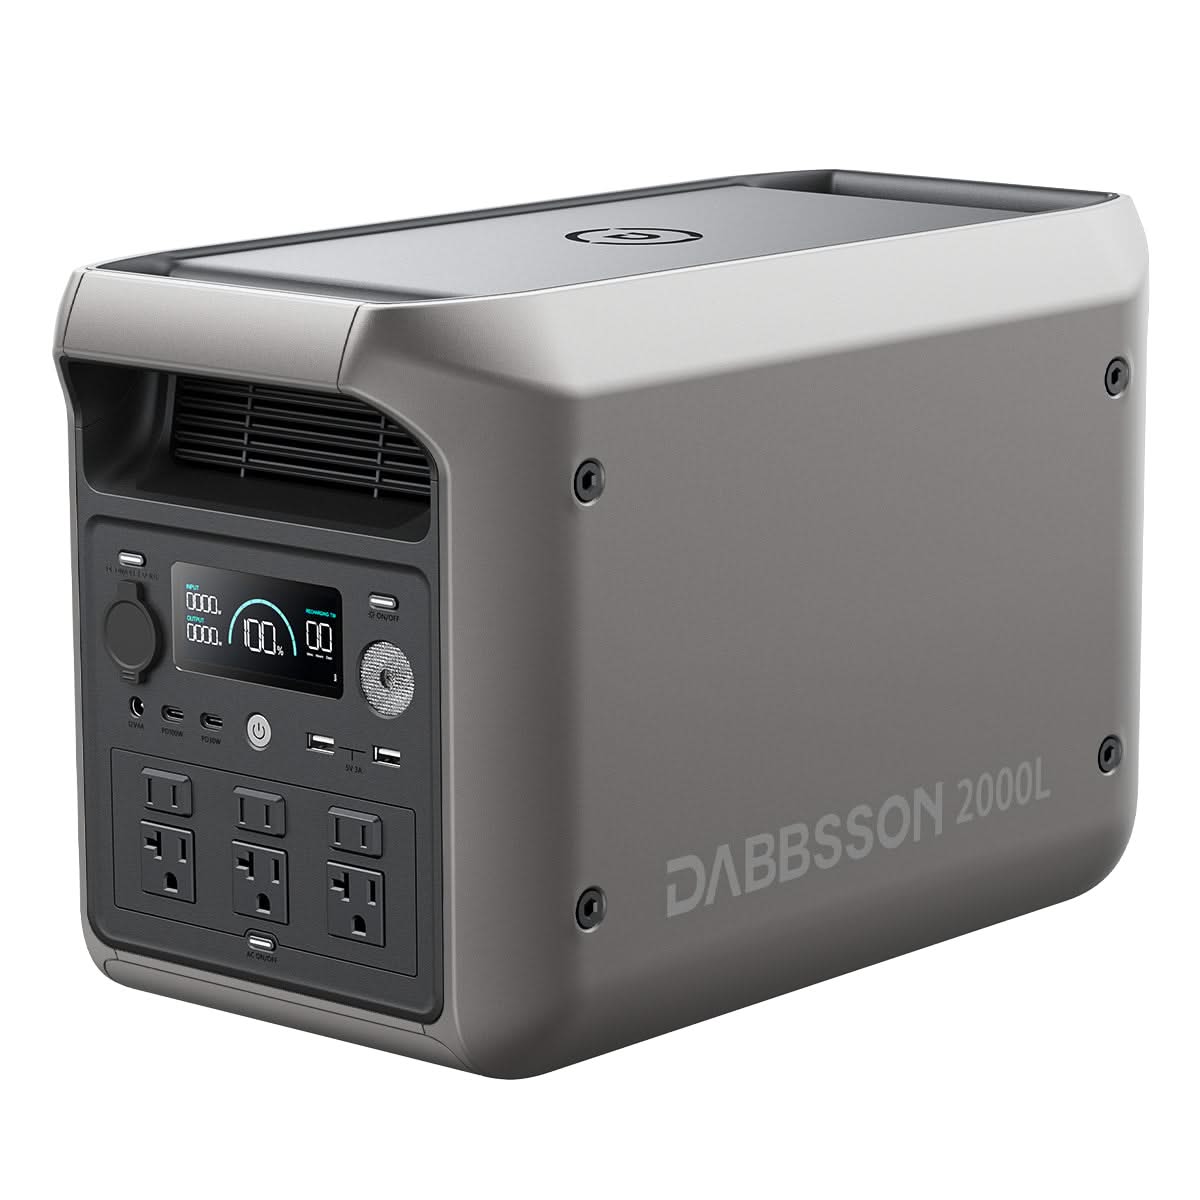


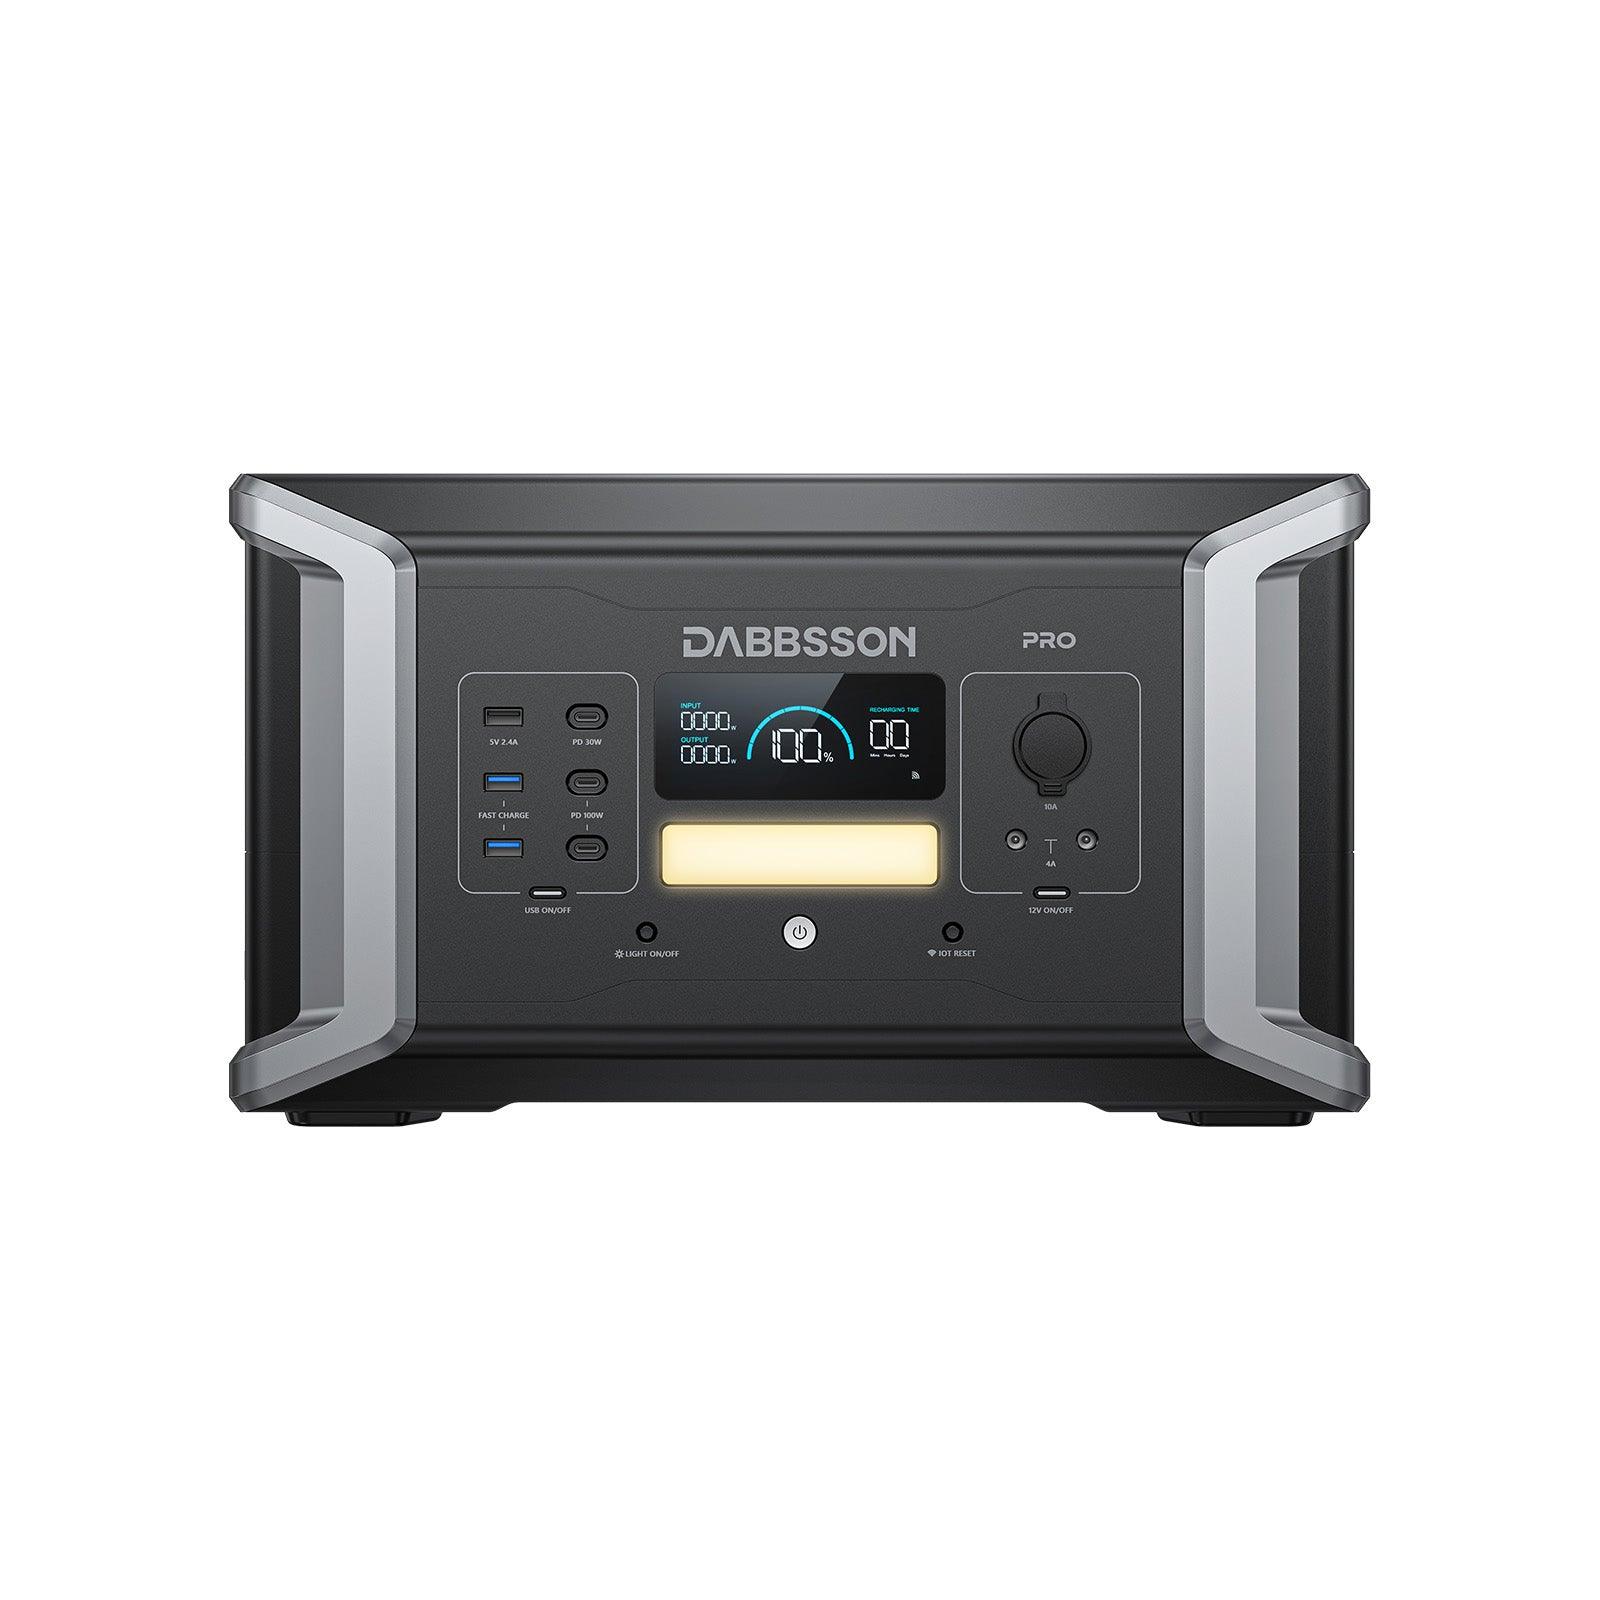
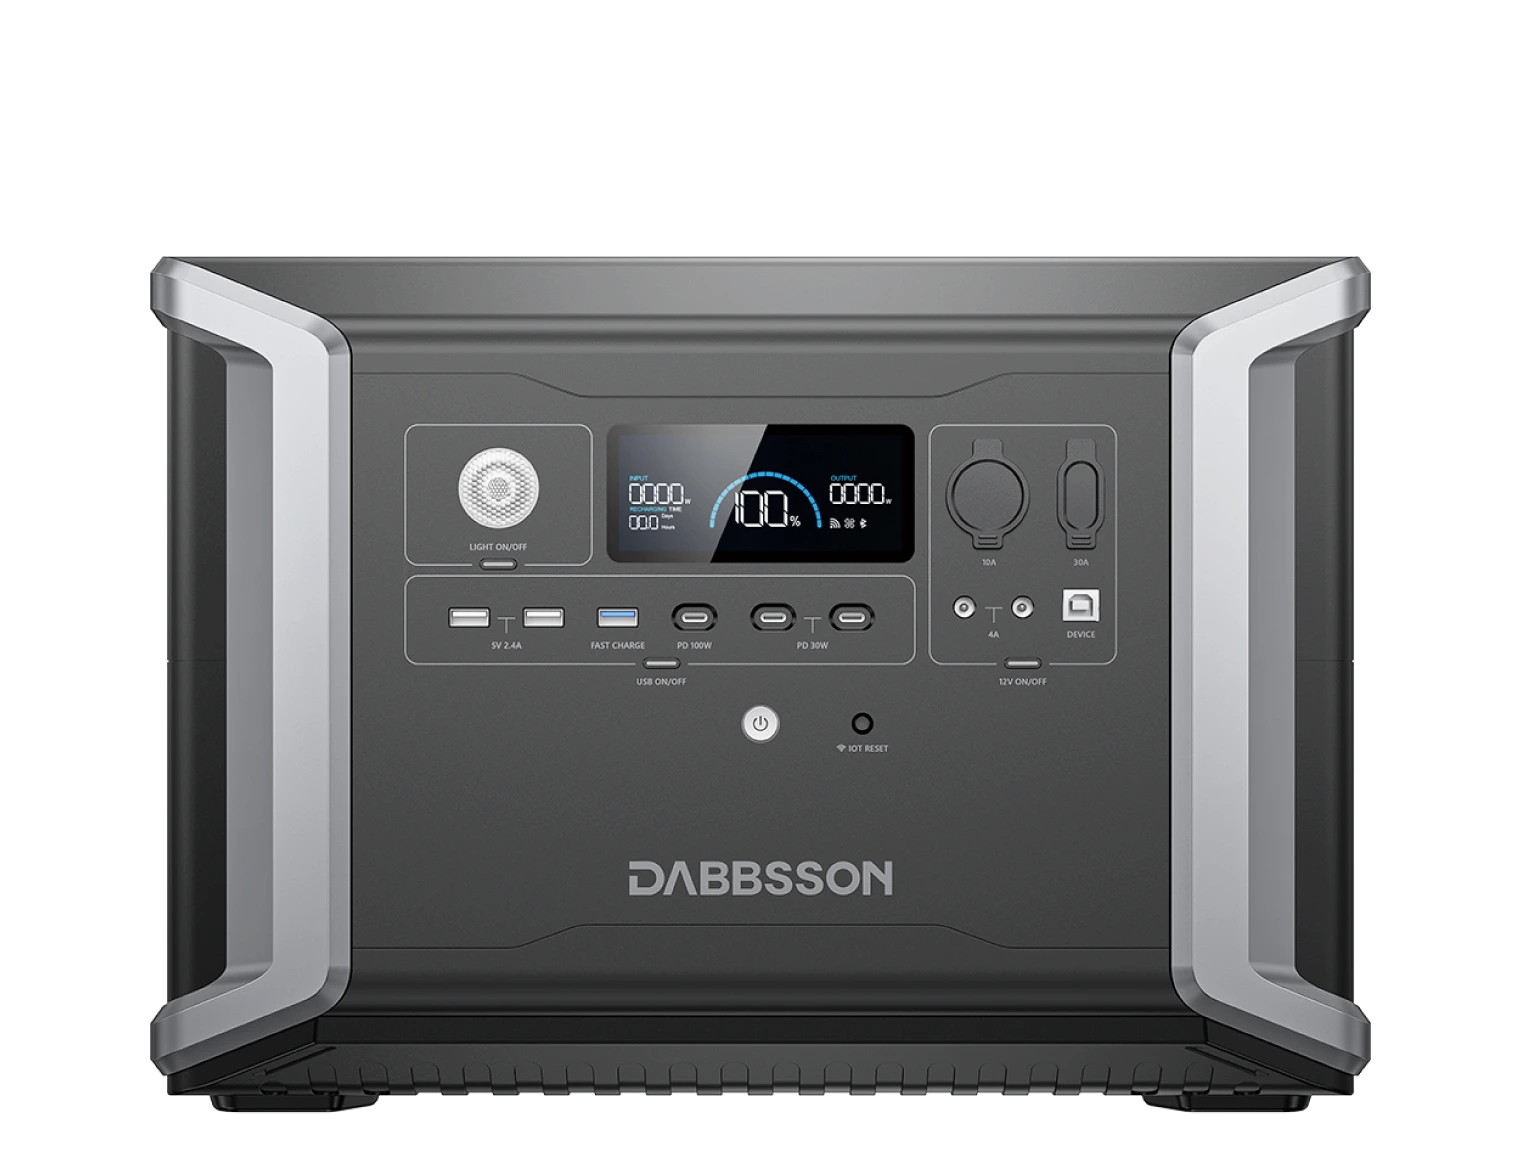
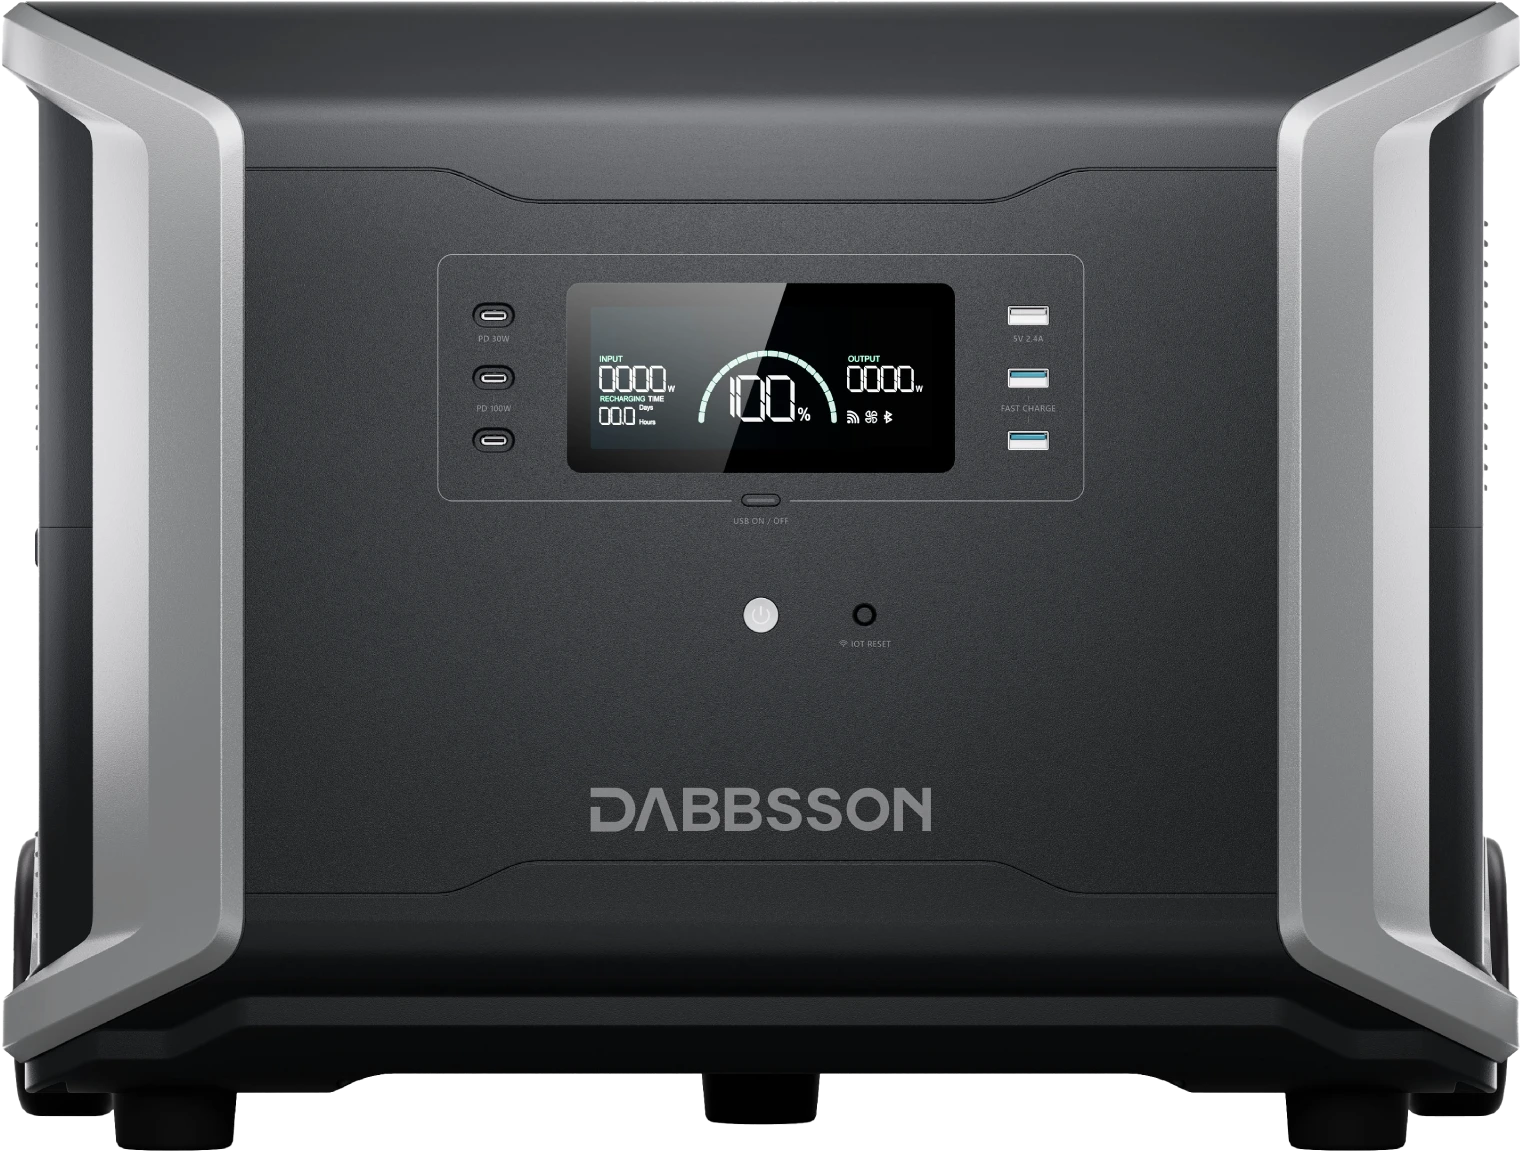
Dabbsson 2000L Portable Power Station
- 2200W AC output, 3300W in Power-boost, Surge 4400W
-
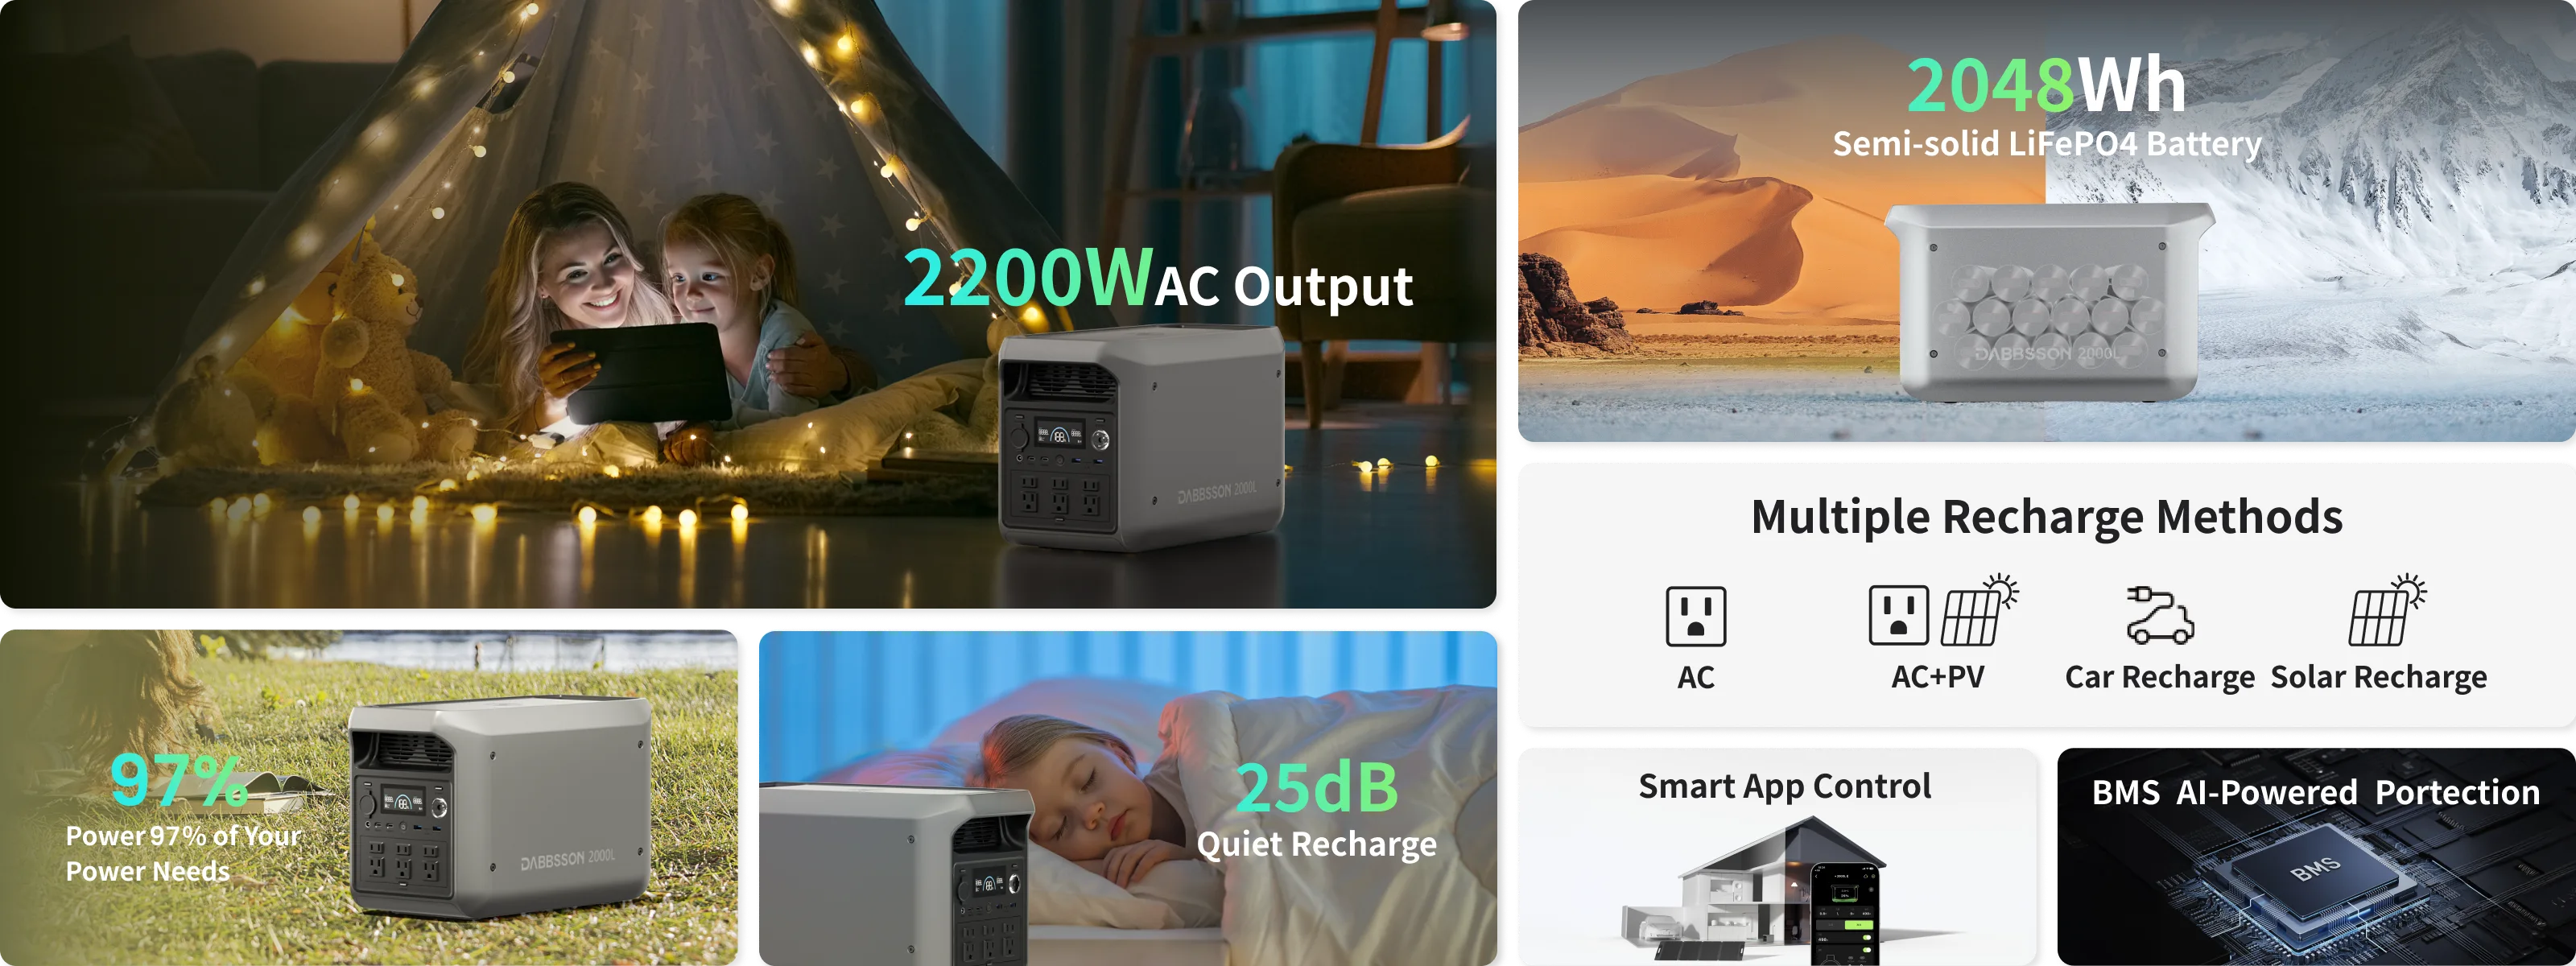
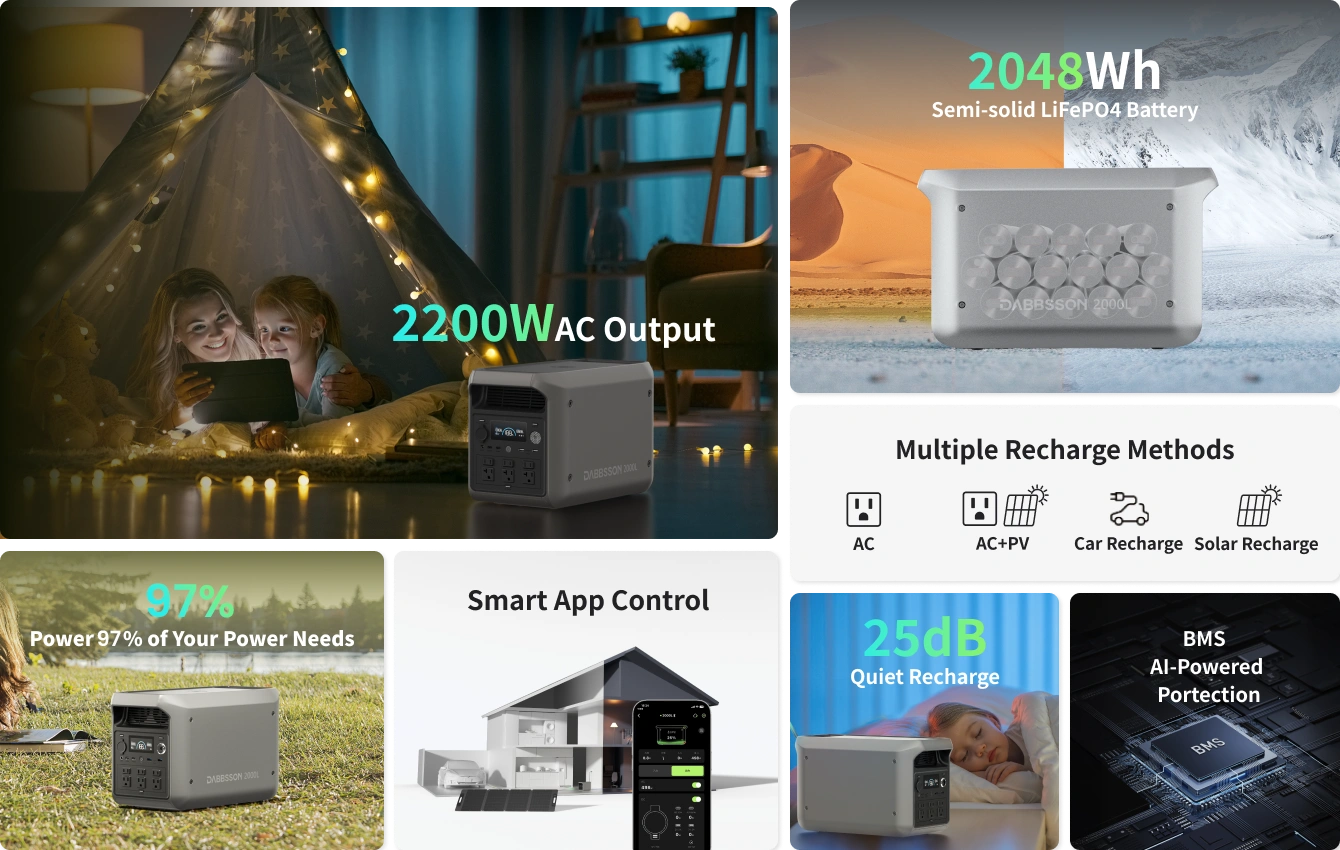
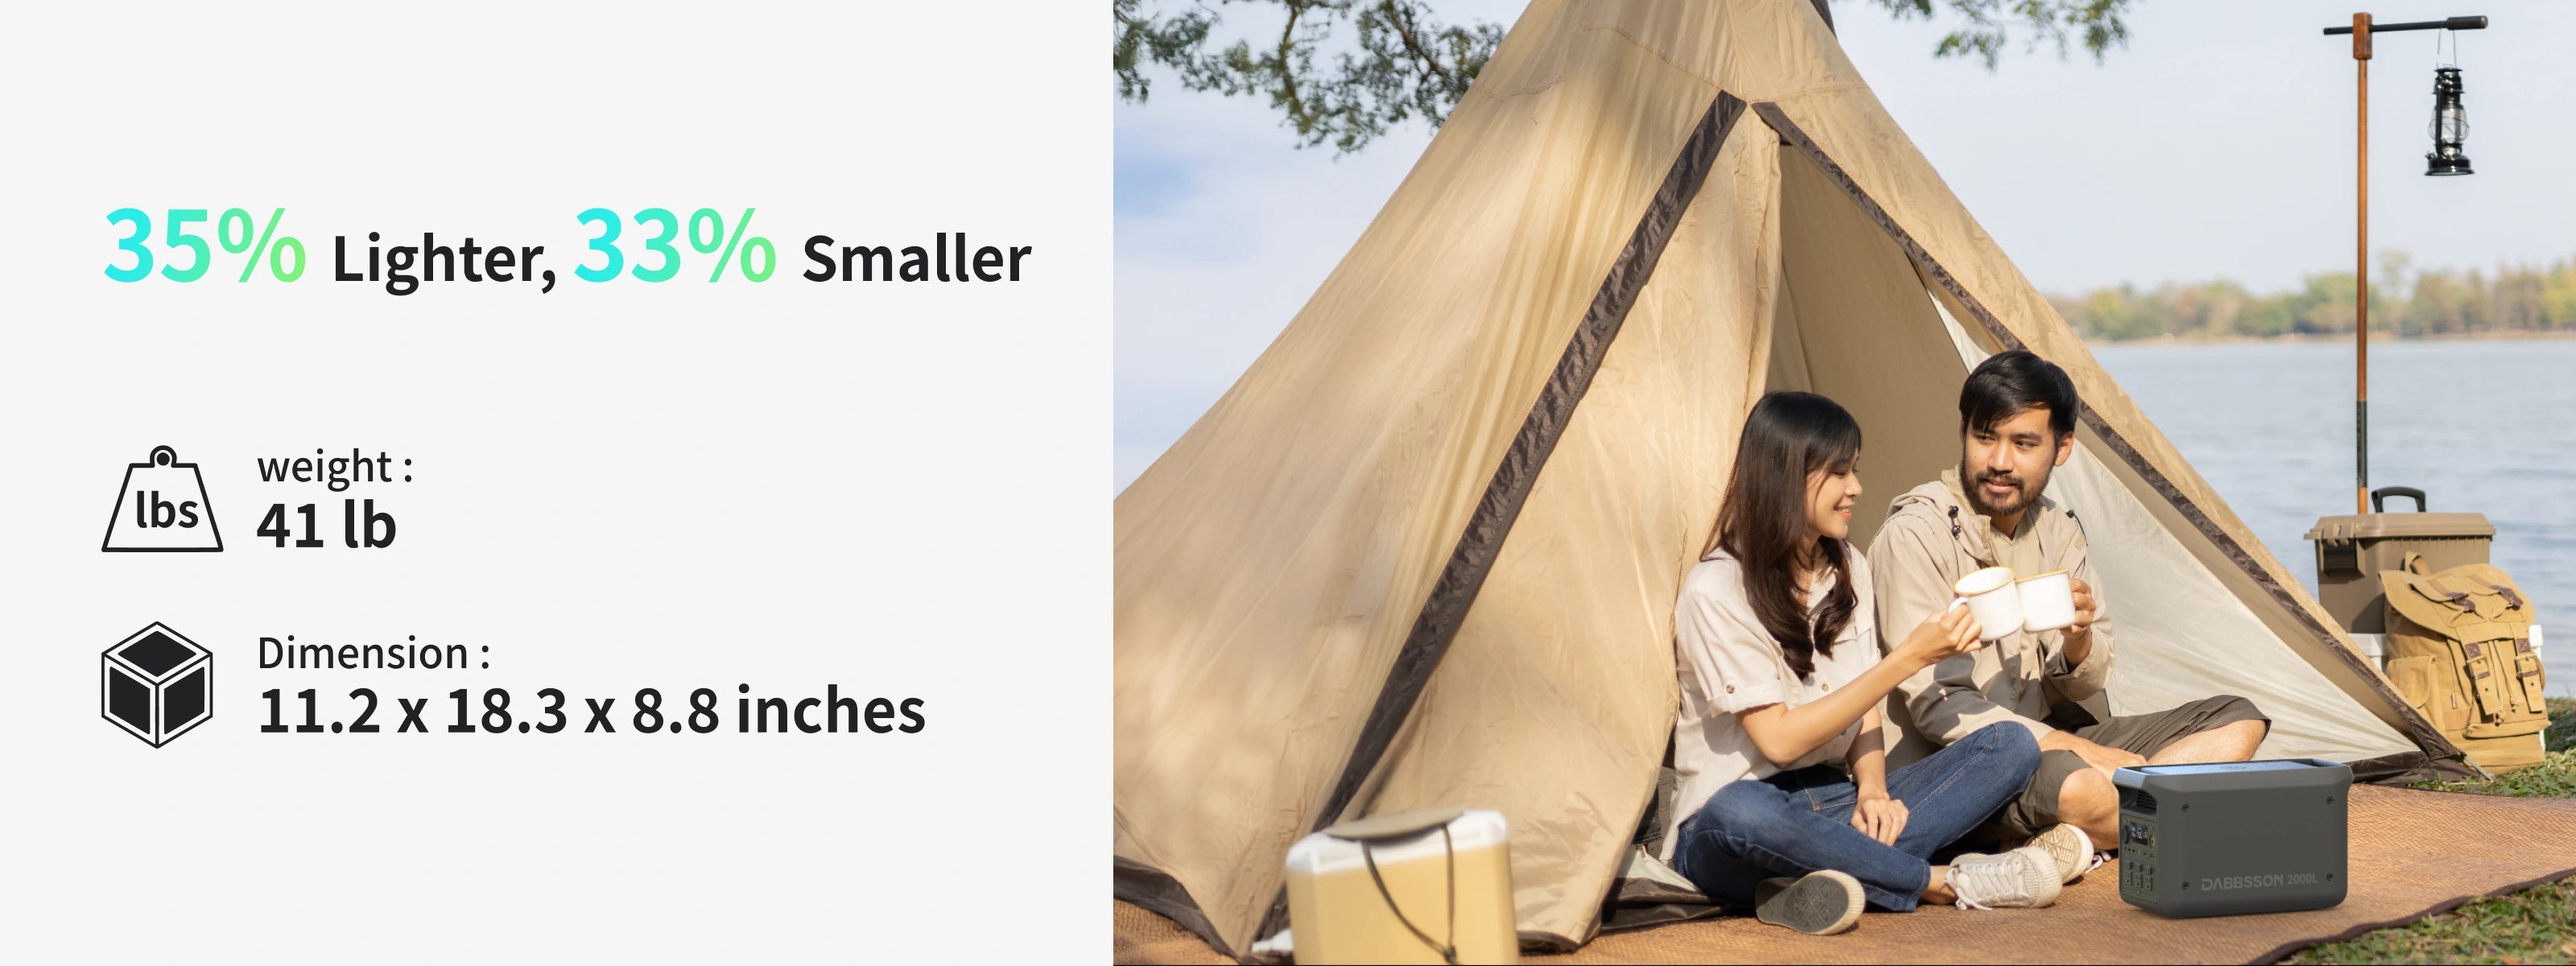
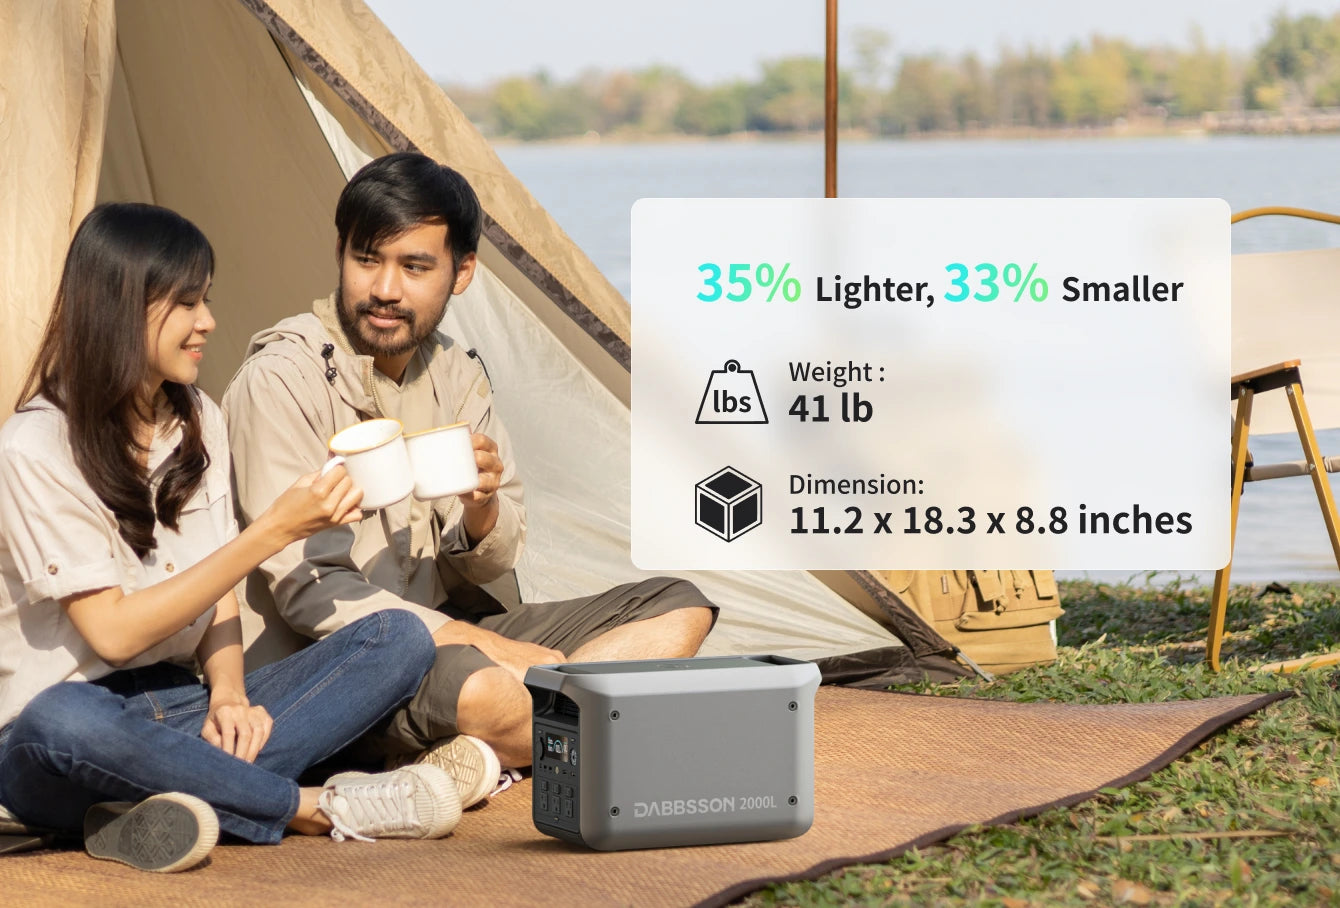
35% lighter than market standard, 2048Wh power station in just 41 lb
- Semi-solid state LFP battery, 10-year lifespan, 4000 charge cycles
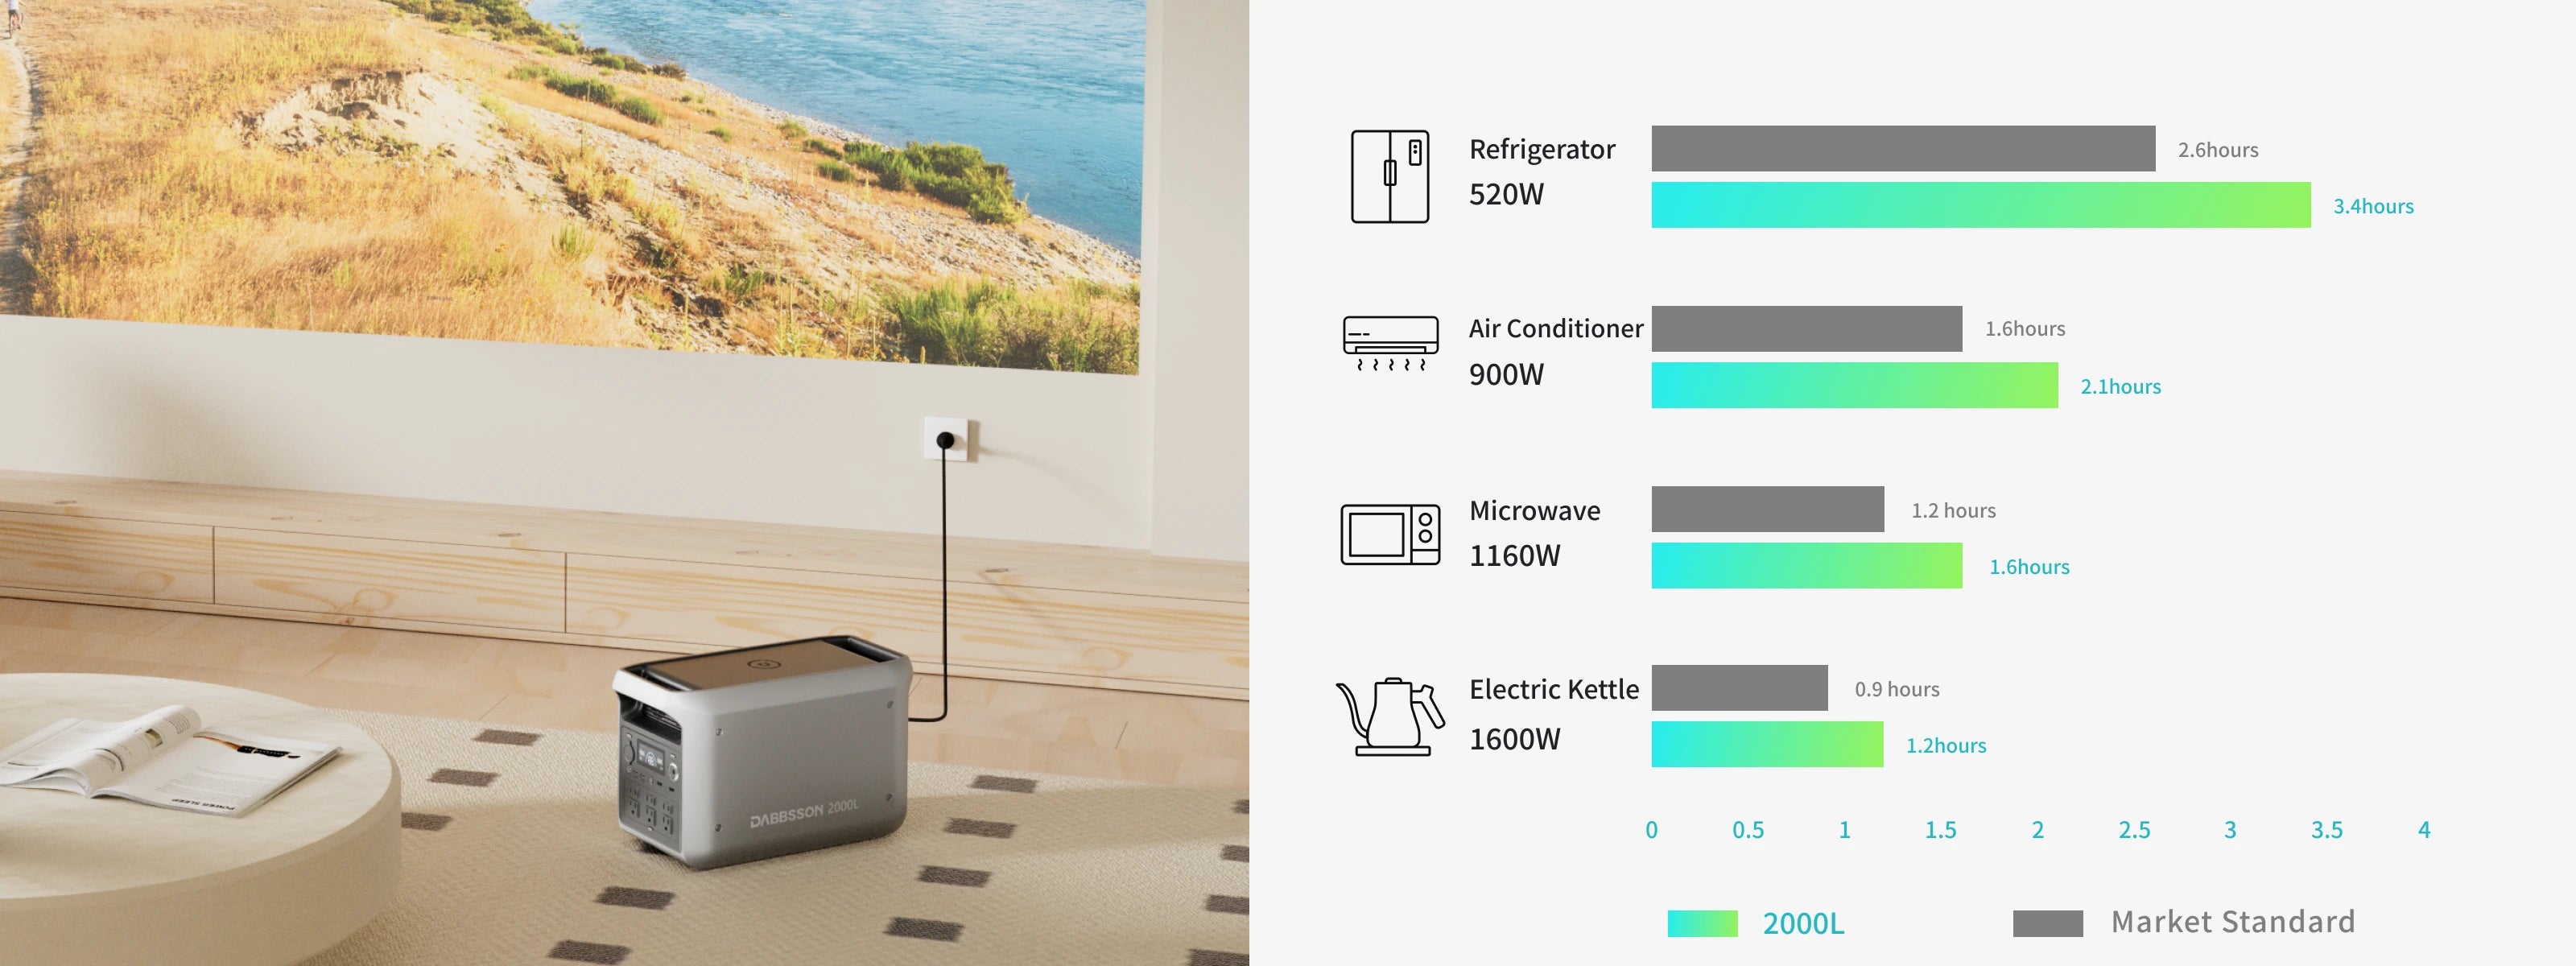
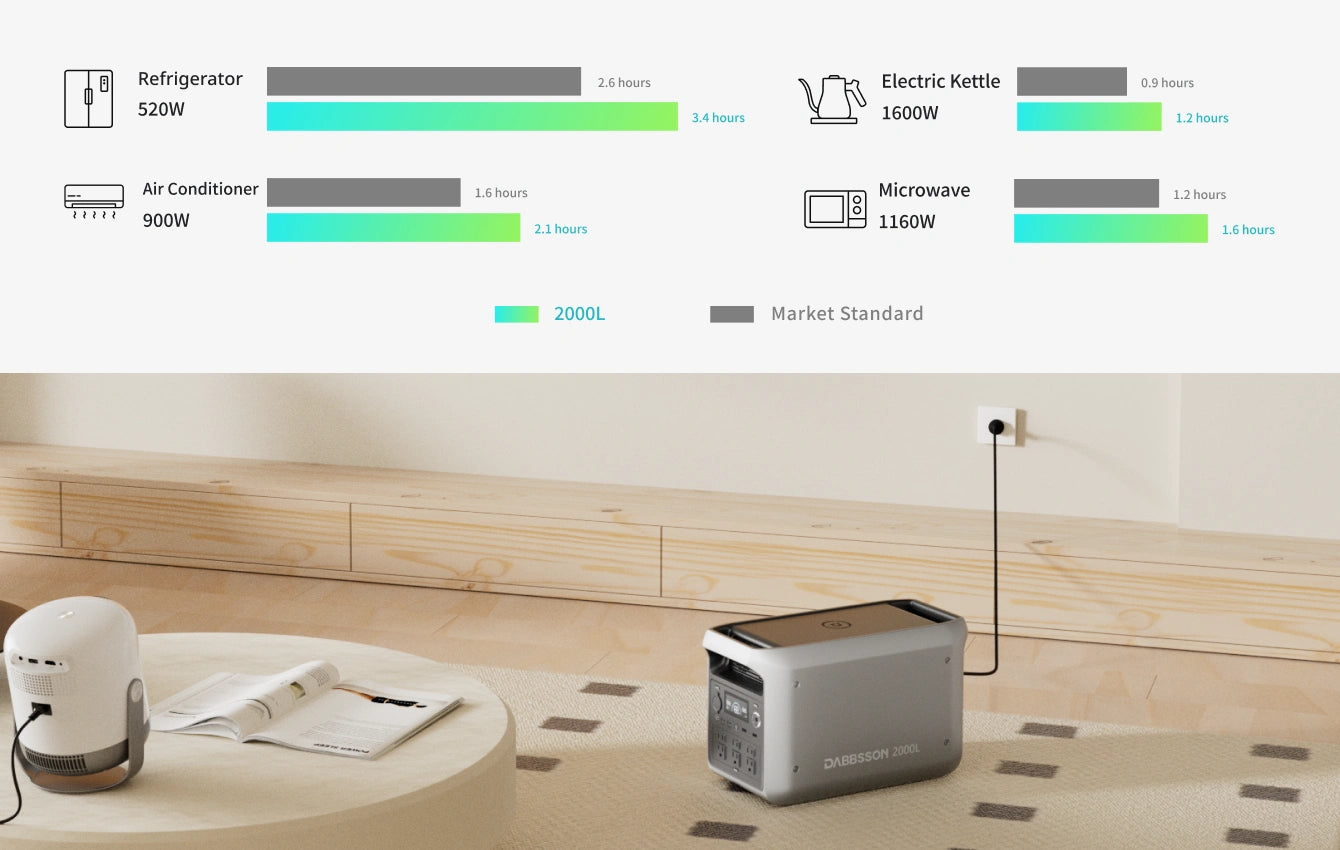
- 1.3× Longer runtime for appliances under 1600W
- Multiple recharge ways: AC, Solar, Car Charging, AC + Solar
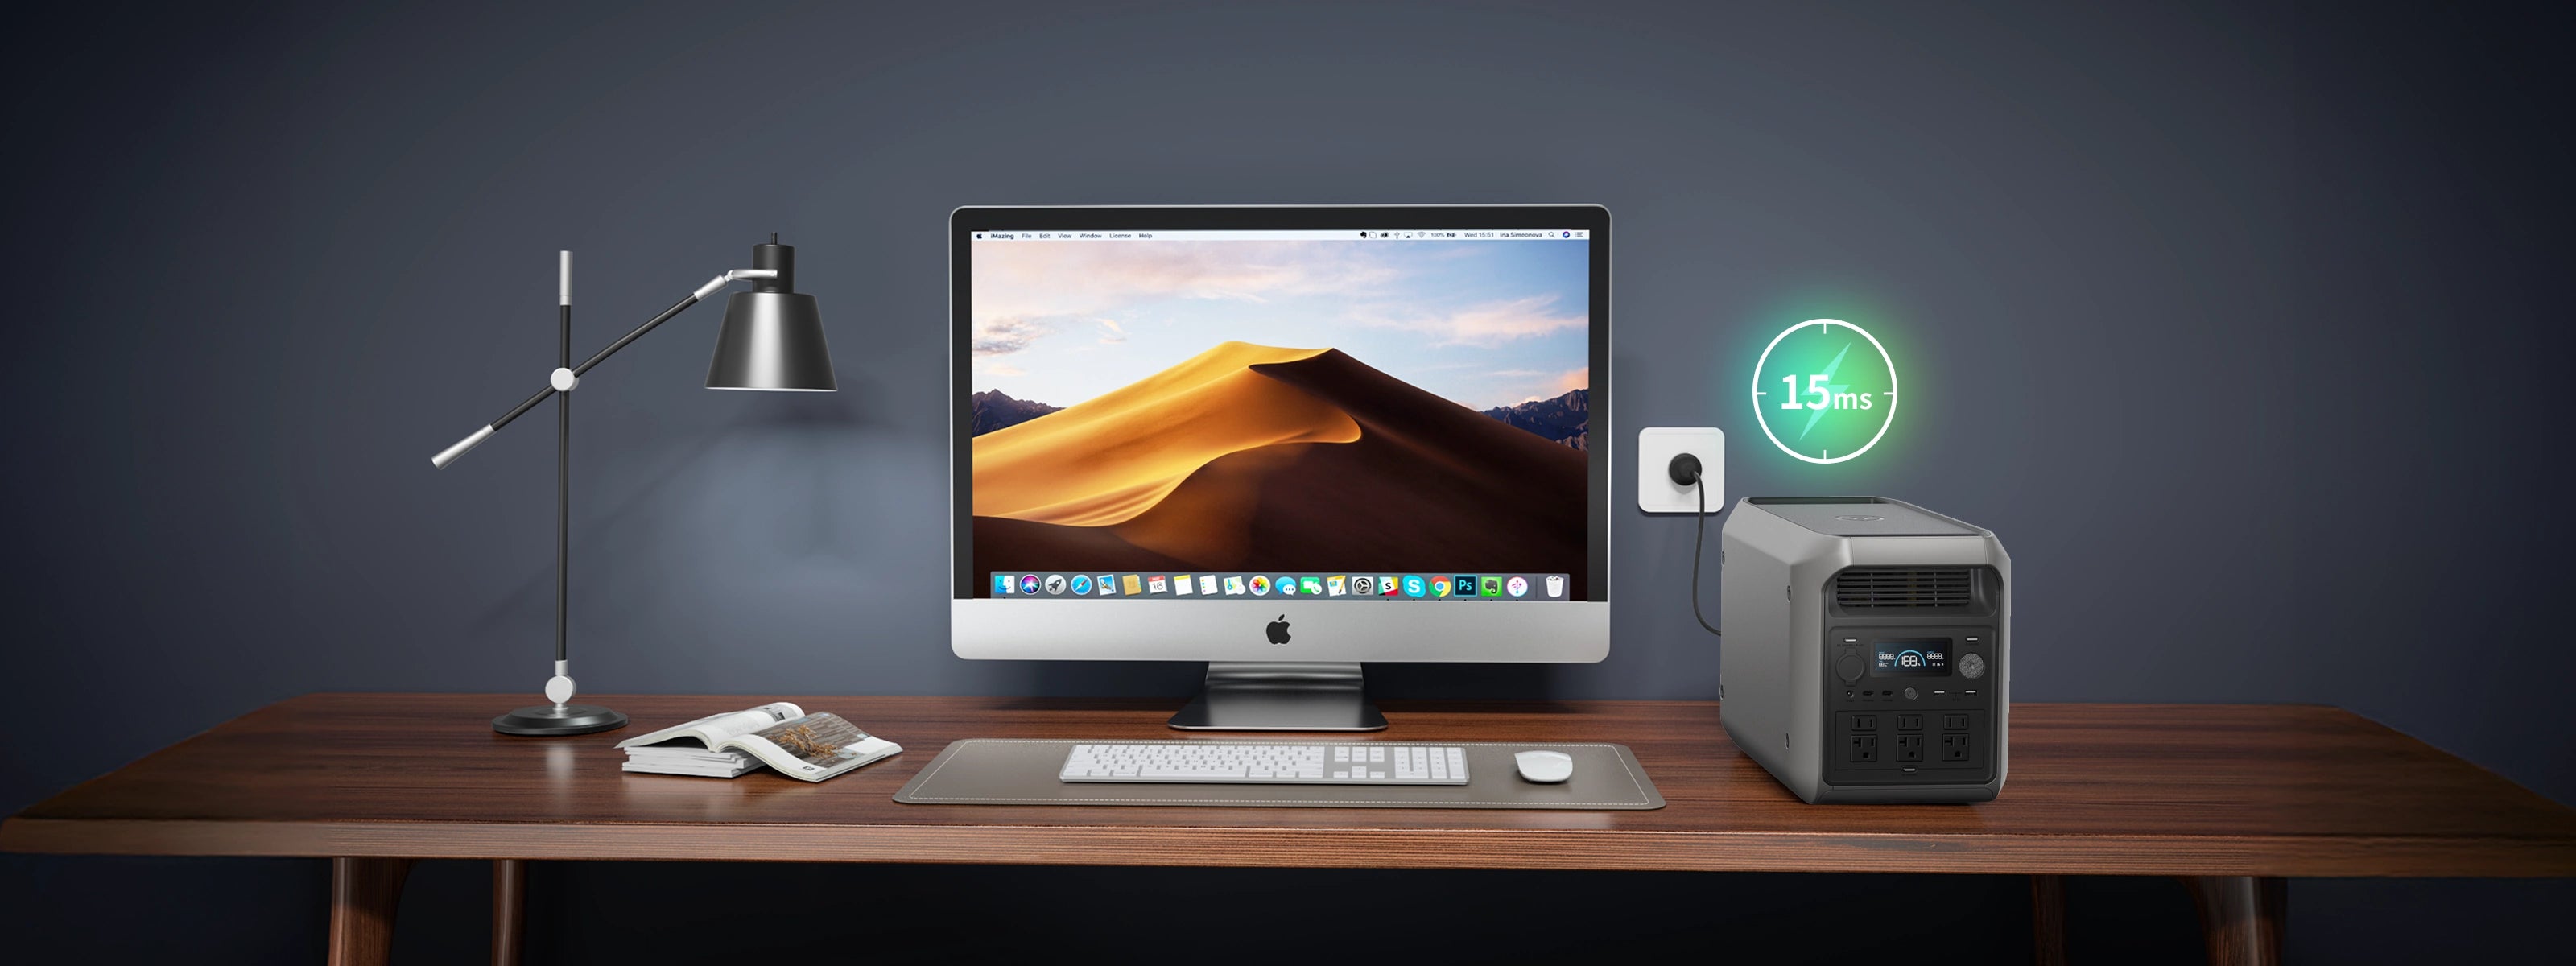
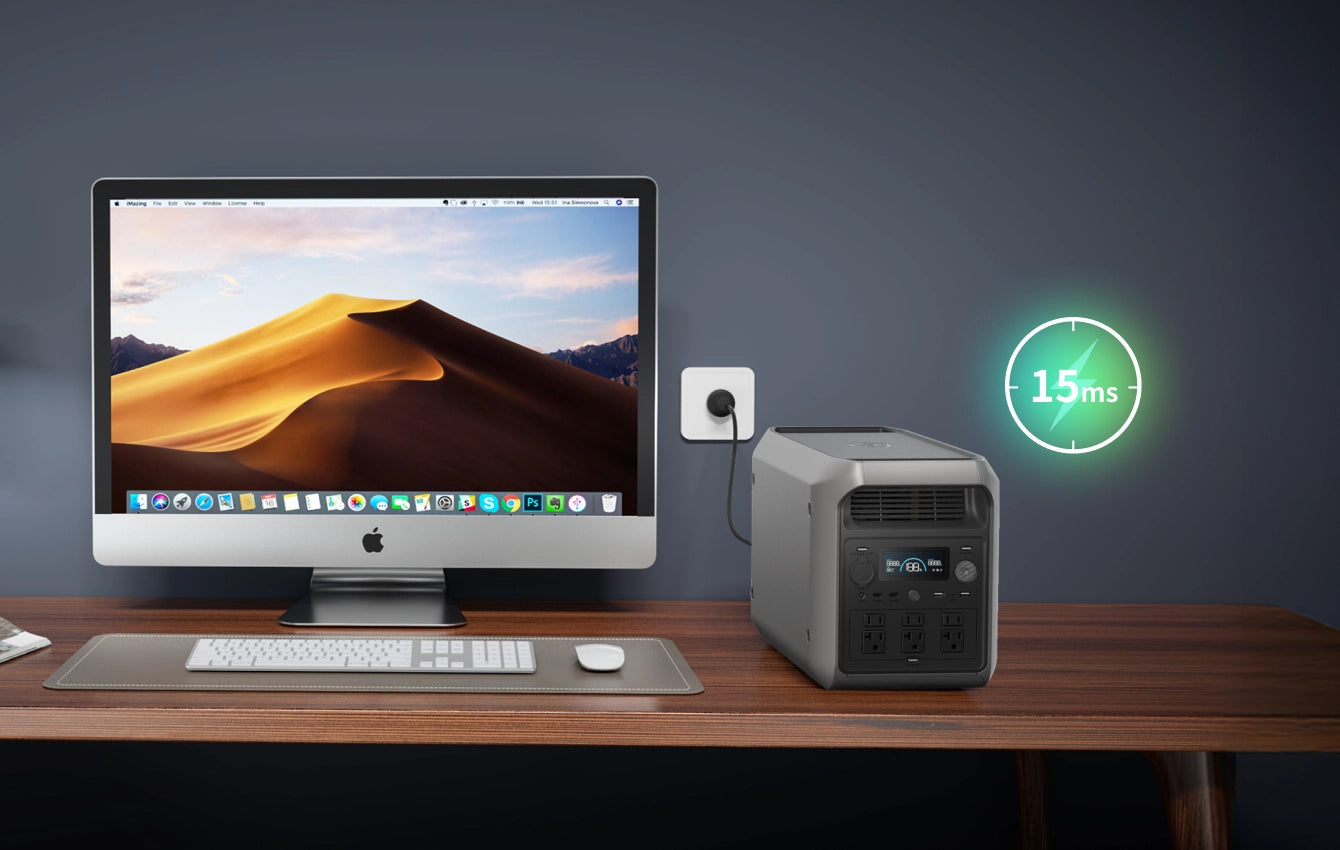
- 15ms EPS for seamless power switchover during outages
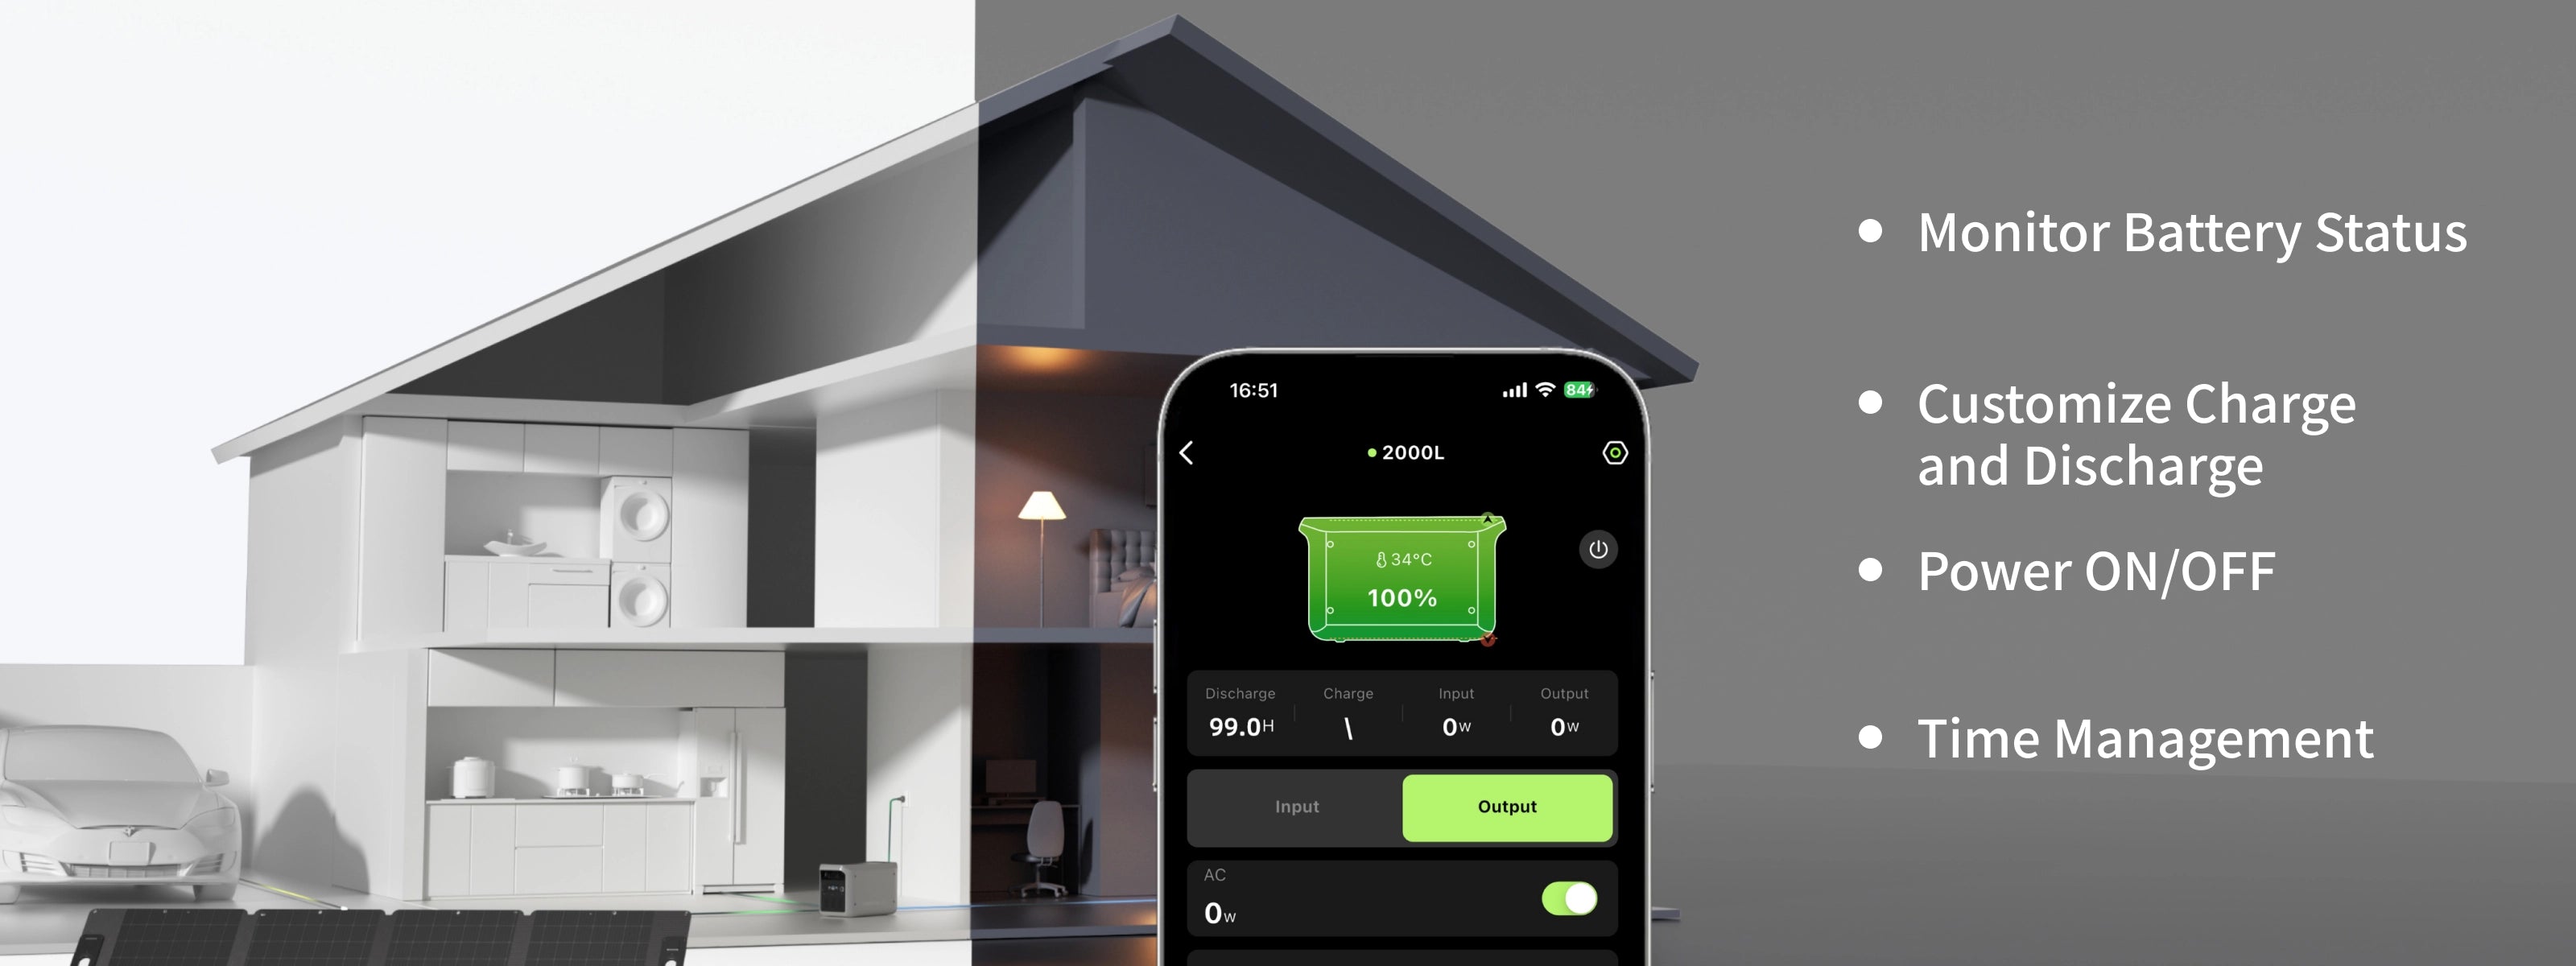
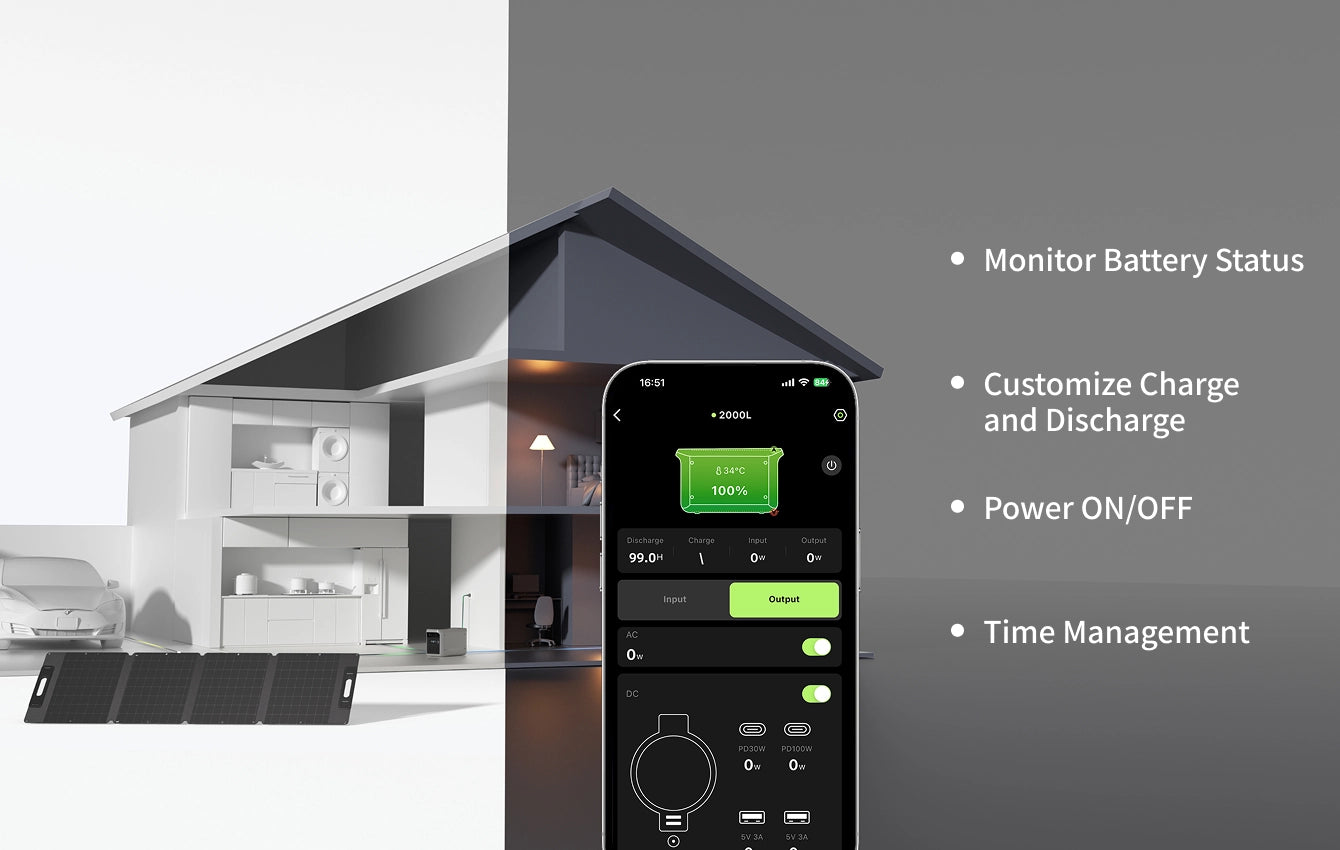
- Smart energy management via Dabbsson App
- 5-year warranty coverage: 3-year base warranty + 2-year extended warranty, automatically applied when purchased from the official website
3-5 business days
3+2 Years Warranty
30-Day Money Back
Lifetime Support
Portable Power Wherever You Go
Compact and Powerful
The Dabbsson 2000L packs a serious punch—with a 2200W output and a Power-Boost Mode that kicks it up to 3300W for heavy-duty tasks. Plus, as one of the lightest 2kWh power stations in the market, it's easy to take it to anywhere and can handle 99% of your power needs.


Dabbsson 2000L (2048Wh)
Please Enter the Wattage of the Appliance. (Under 2200W)
Power That Fits Anywhere
Dabbsson 2000L comes in 35% Lighter, 33% Smaller than regular 2kWh power station. Thanks to its ultra-compact design and sturdy aluminum alloy handle, you can easily carry and fit it in just about anywhere.
Up to 4 Ways of Recharge
With multiple charging options available, Dabbsson 2000L provides flexible, efficient, and reliable power anytime, anywhere.


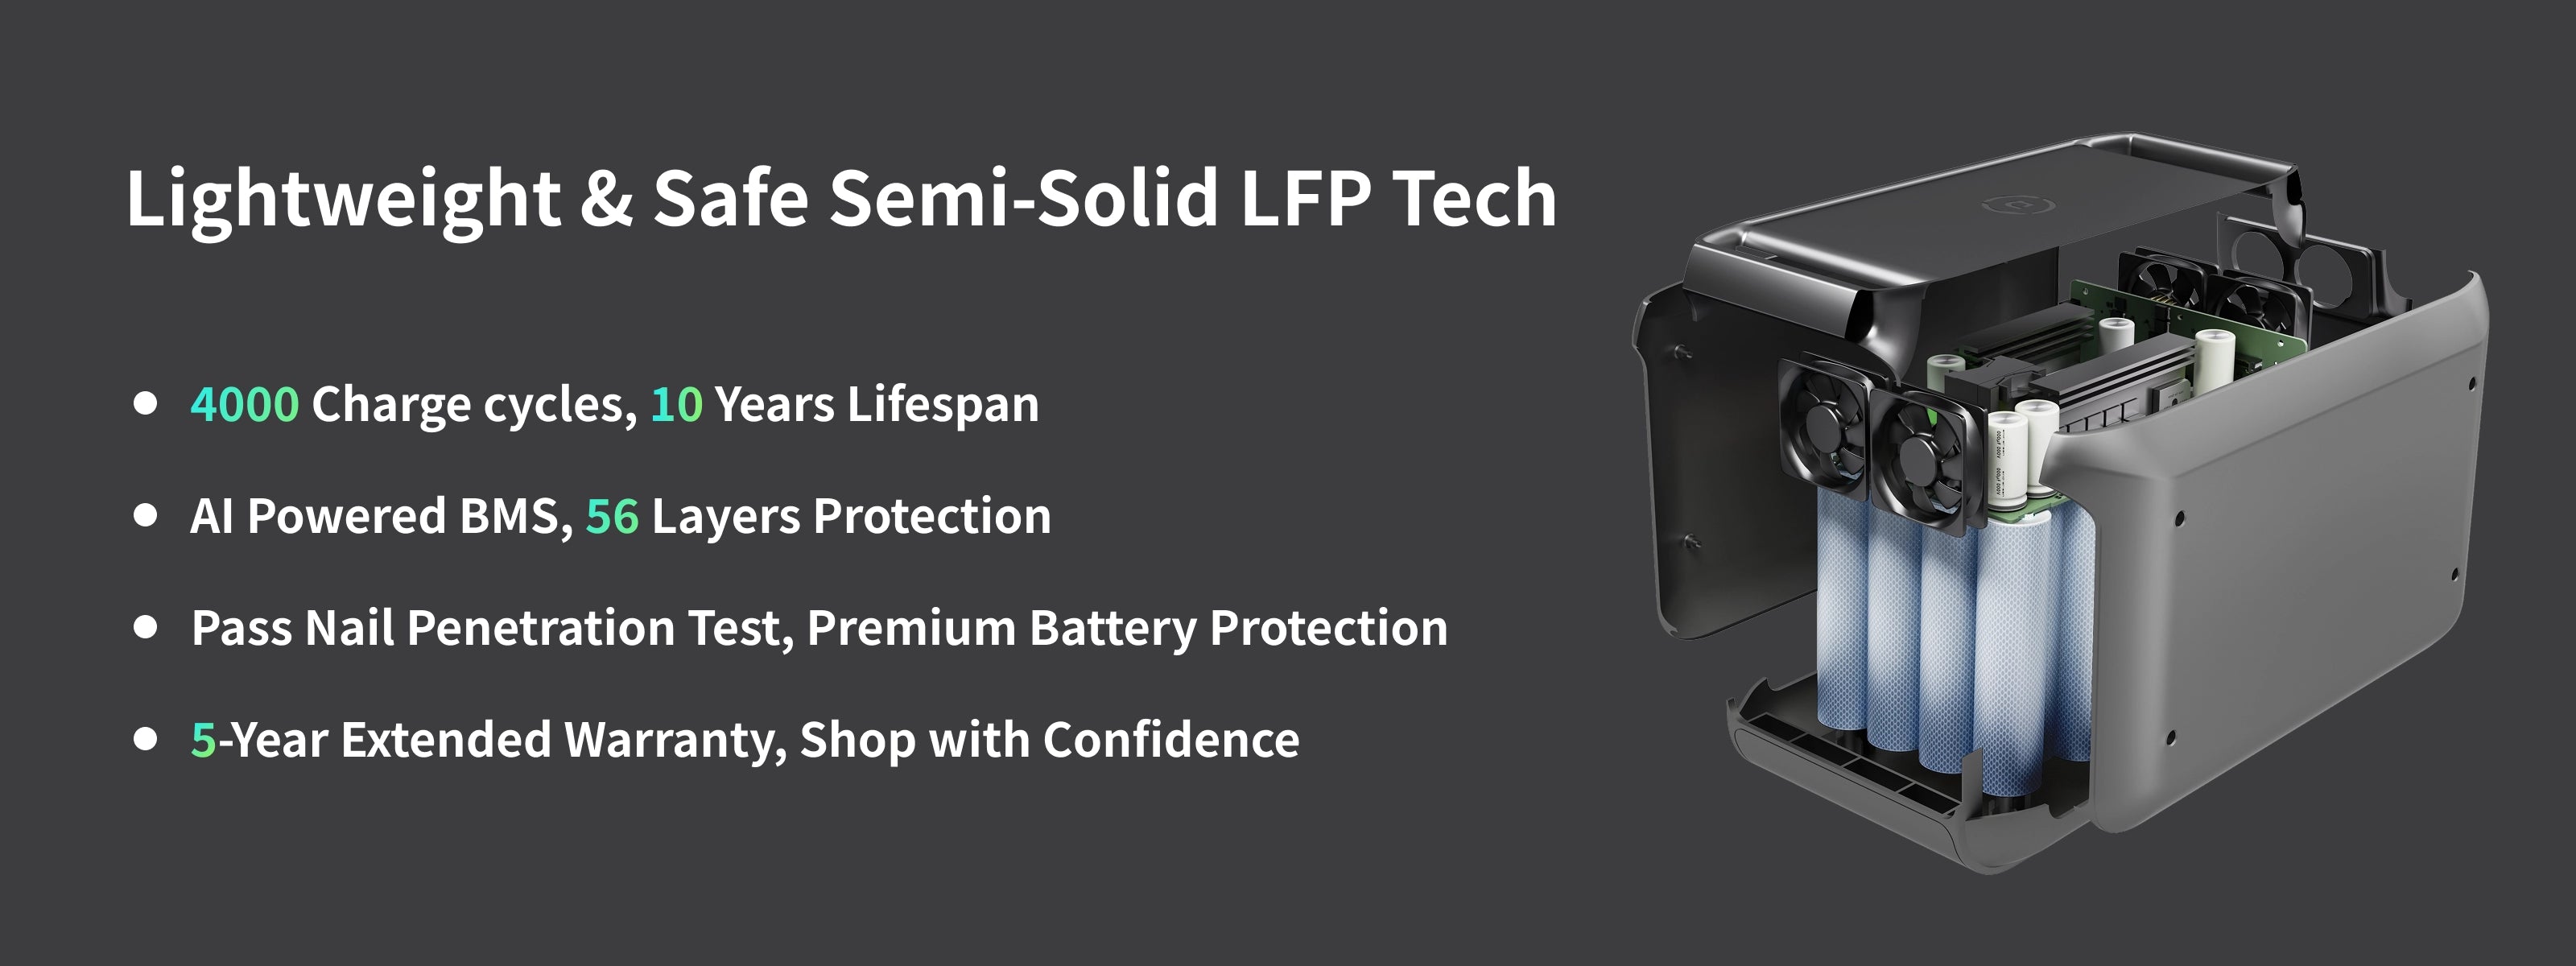
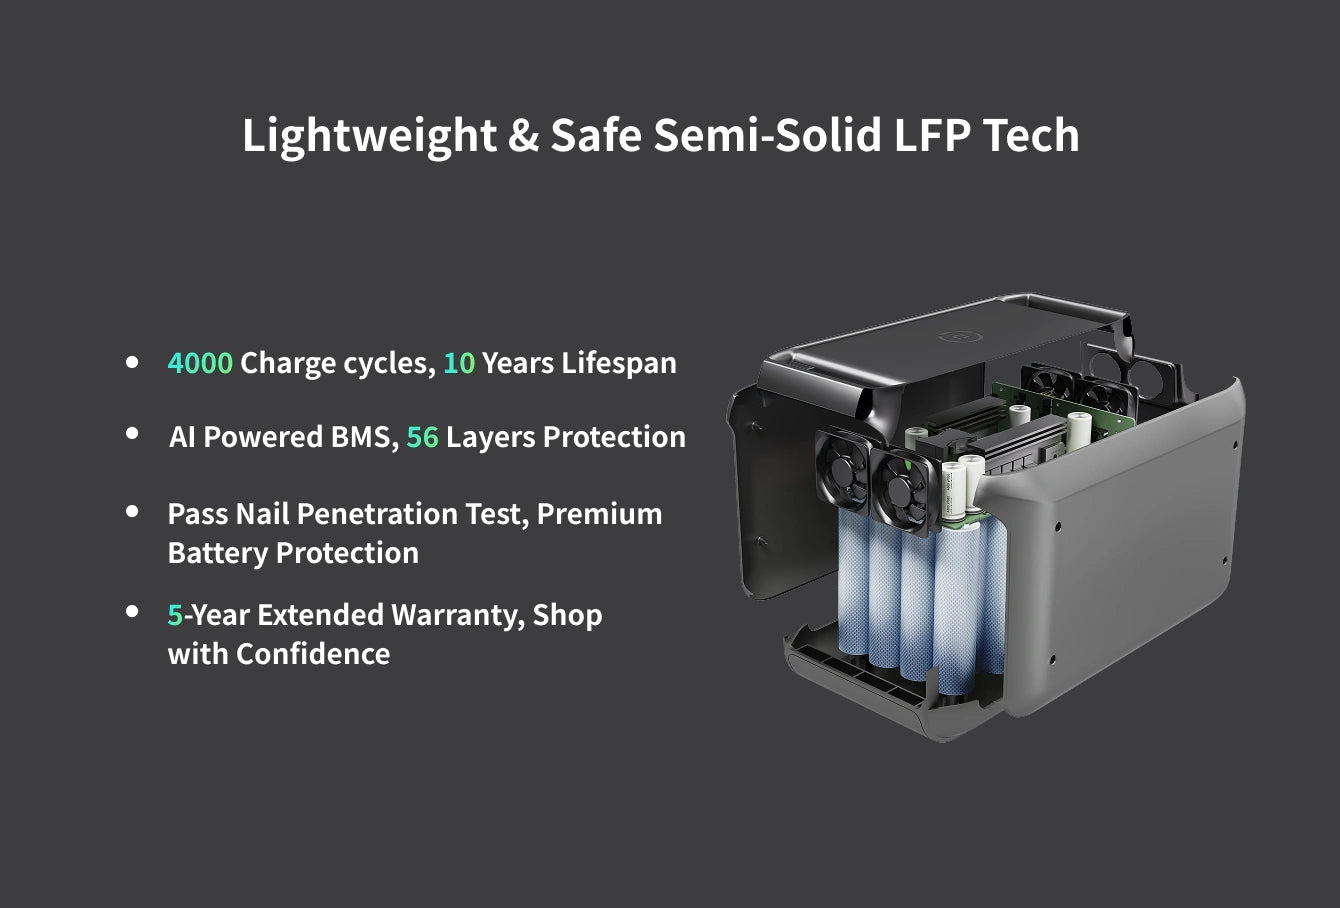
Semi-solid LiFePO4 Battery
Similar to the battery used in high-end electric cars, it retains 80% of battery health after 4000 charge cycles,equivalent to 10 years of use.
Extended 1.3X Runtime
Reduce energy loss during conversion with Dabbsson inverter technology and get 1.3X extended runtime for appliances under 1600W.
Easy Control At Your Fingertips
Use Dabbsson App to remotely control and monitor your power station and set up charging times for peak and off-peak hours.
Uninterrupted Power During Emergency
Dabbsson's built-in EPS Mode supports a <15ms switchover when grid power goes down, ensuring uninterrupted operation for your devices.
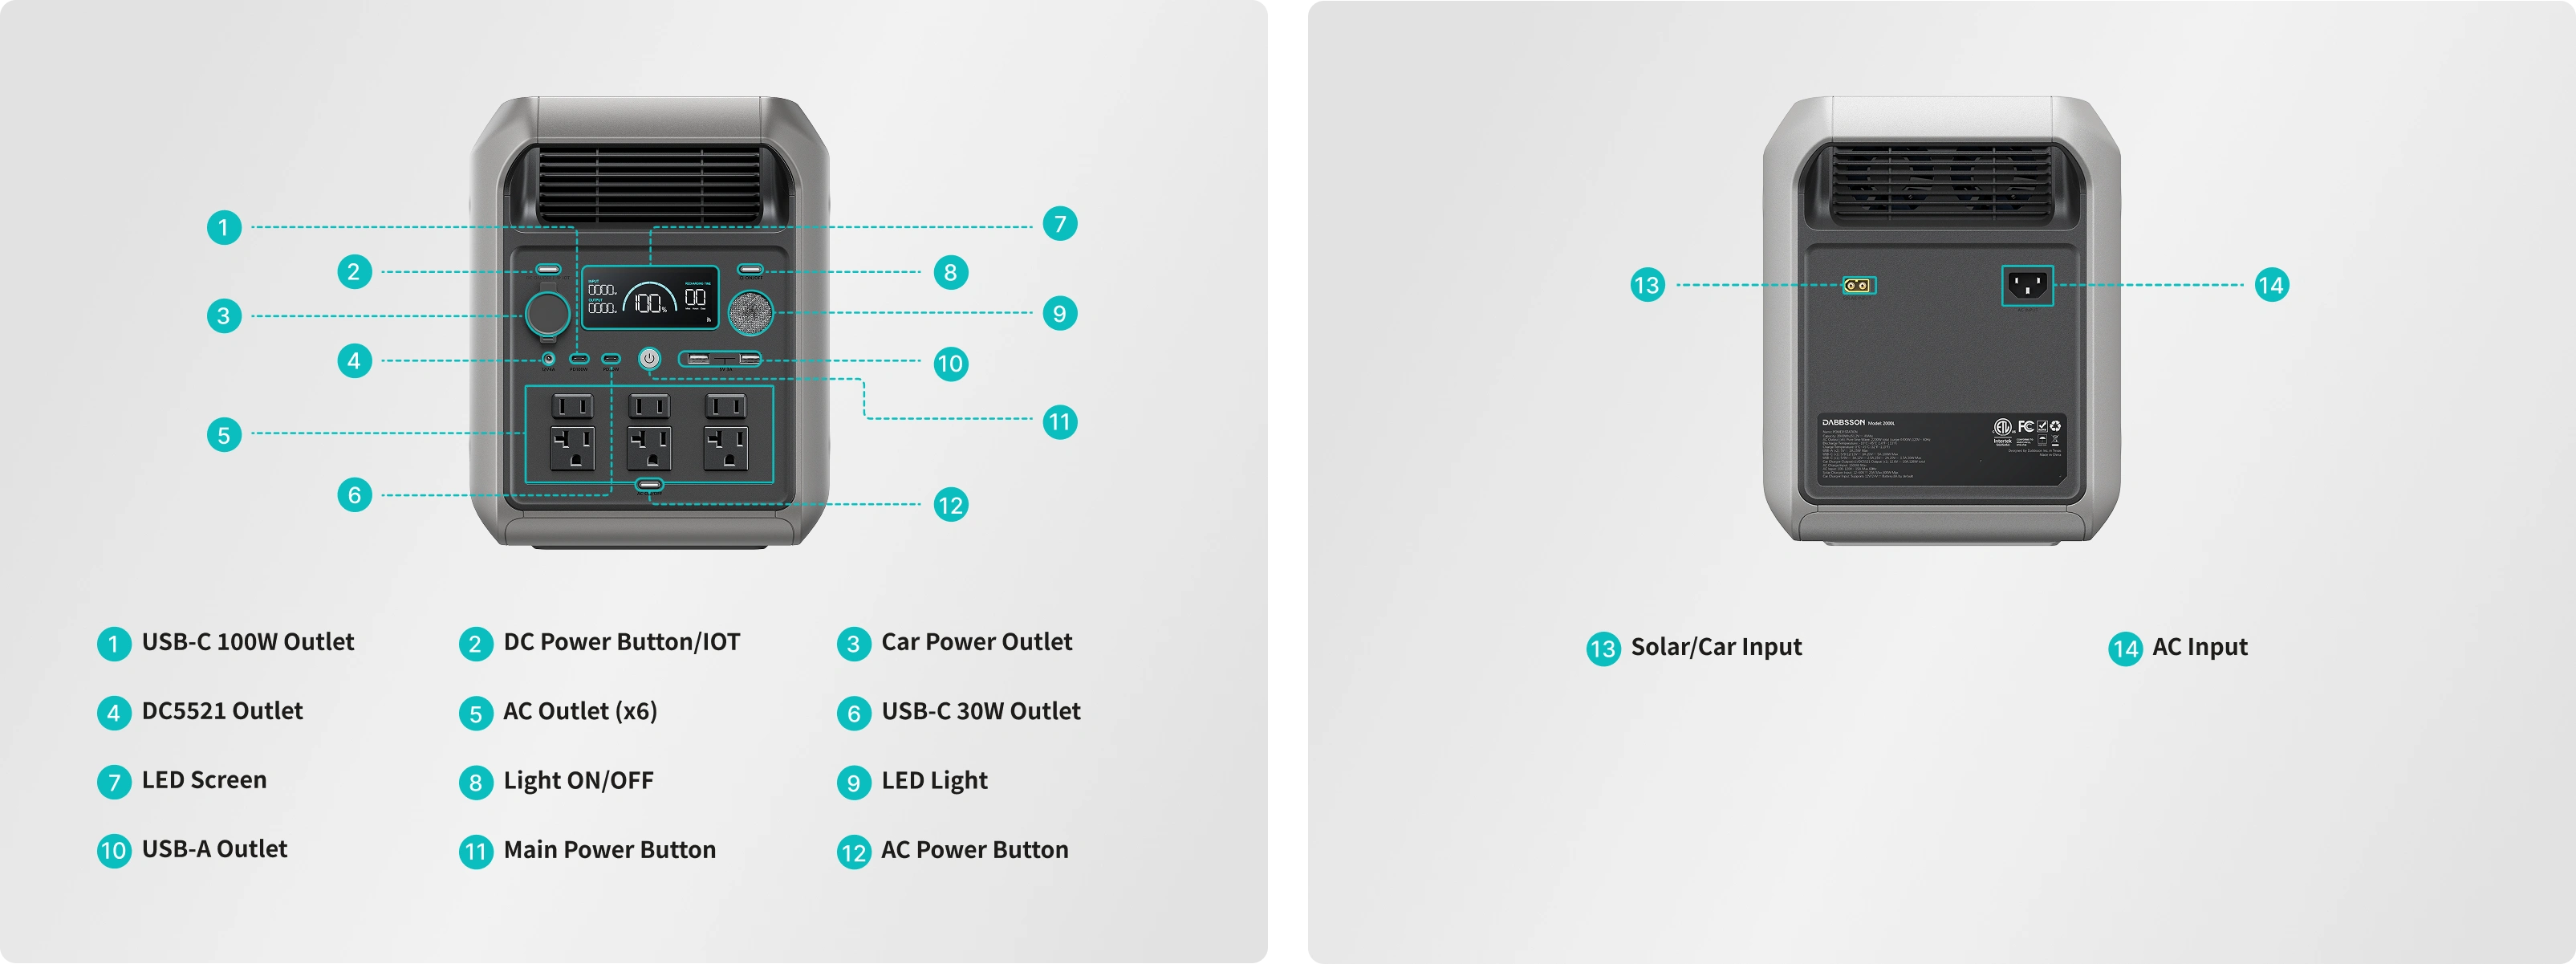
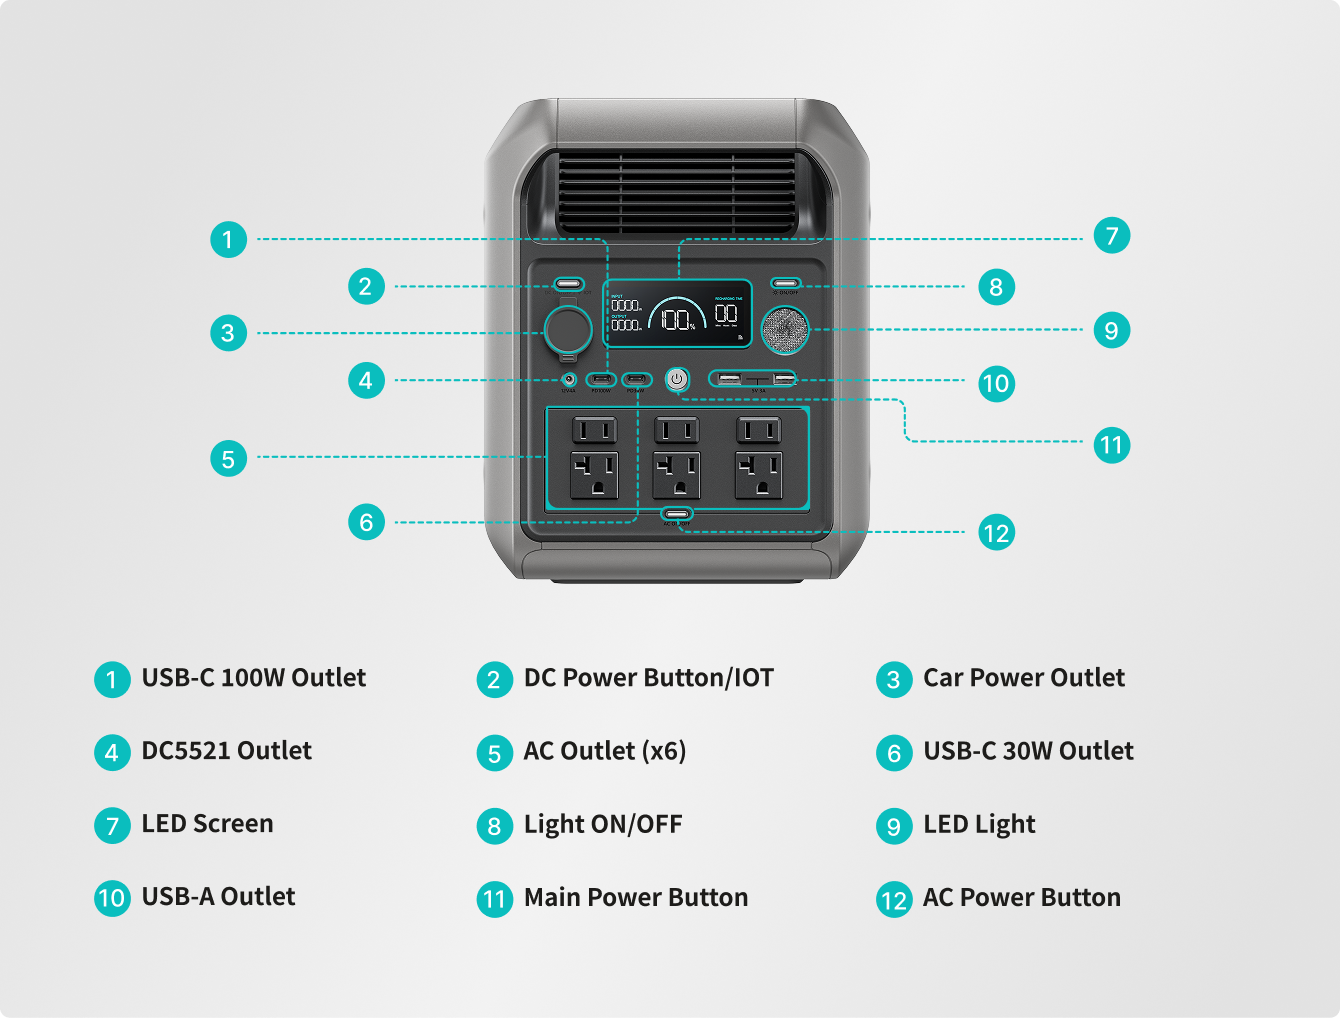
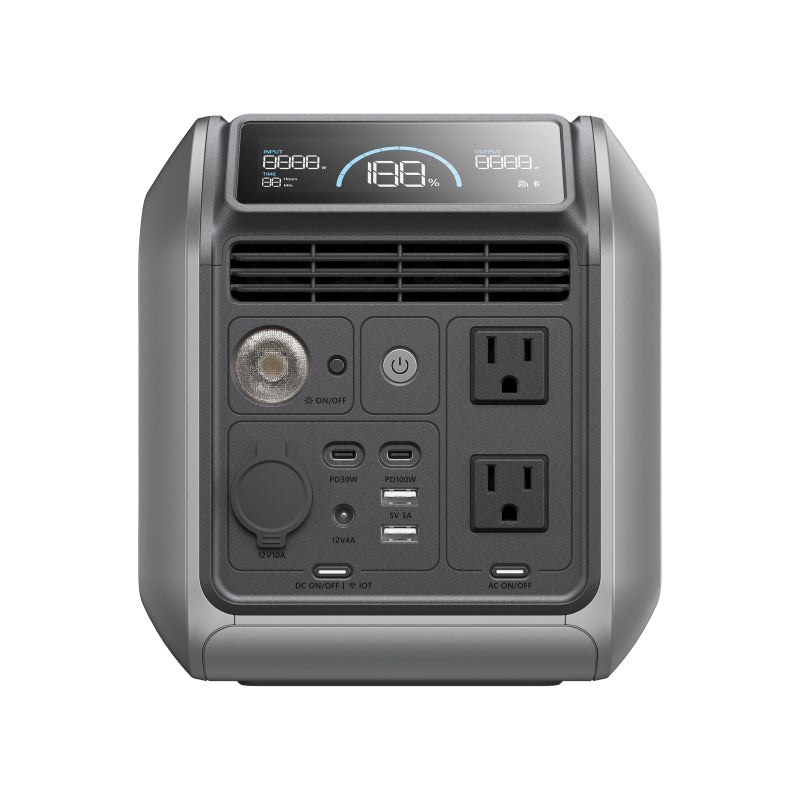
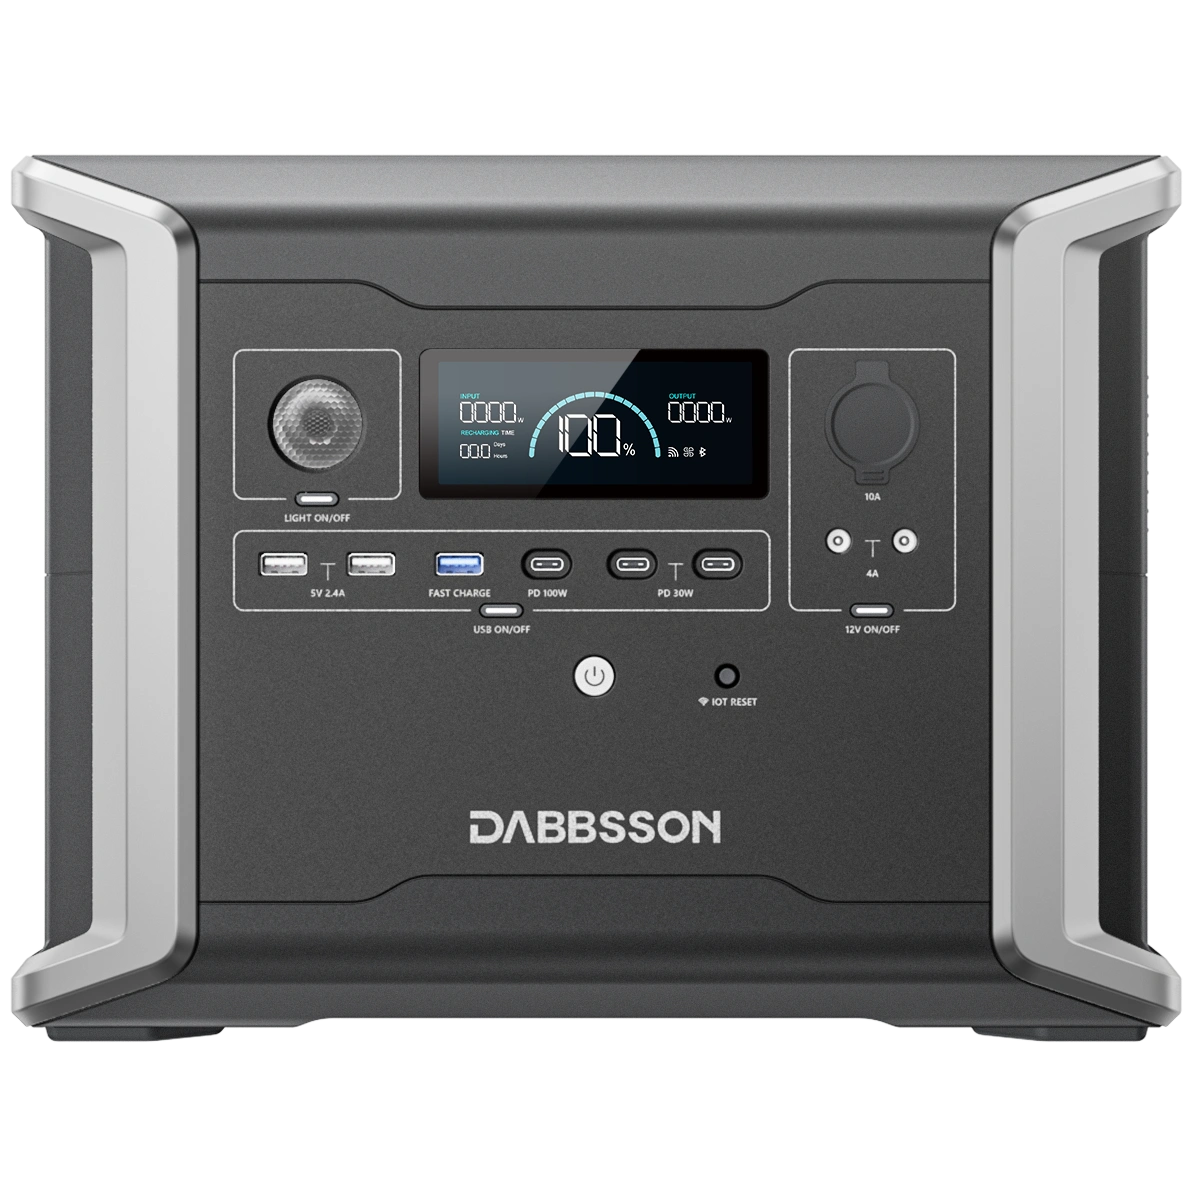
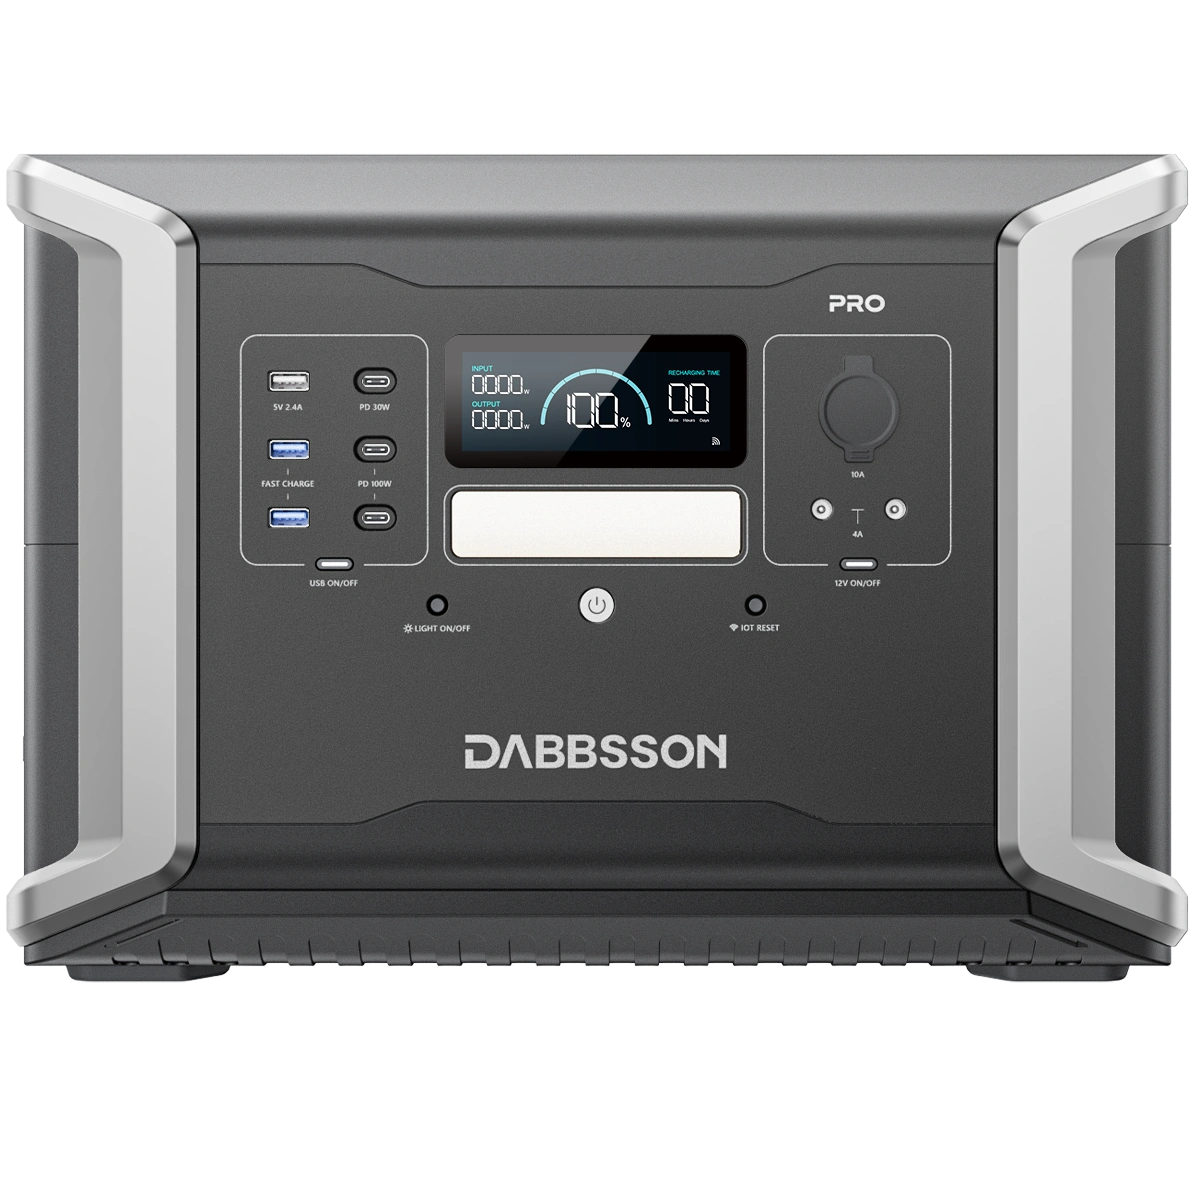
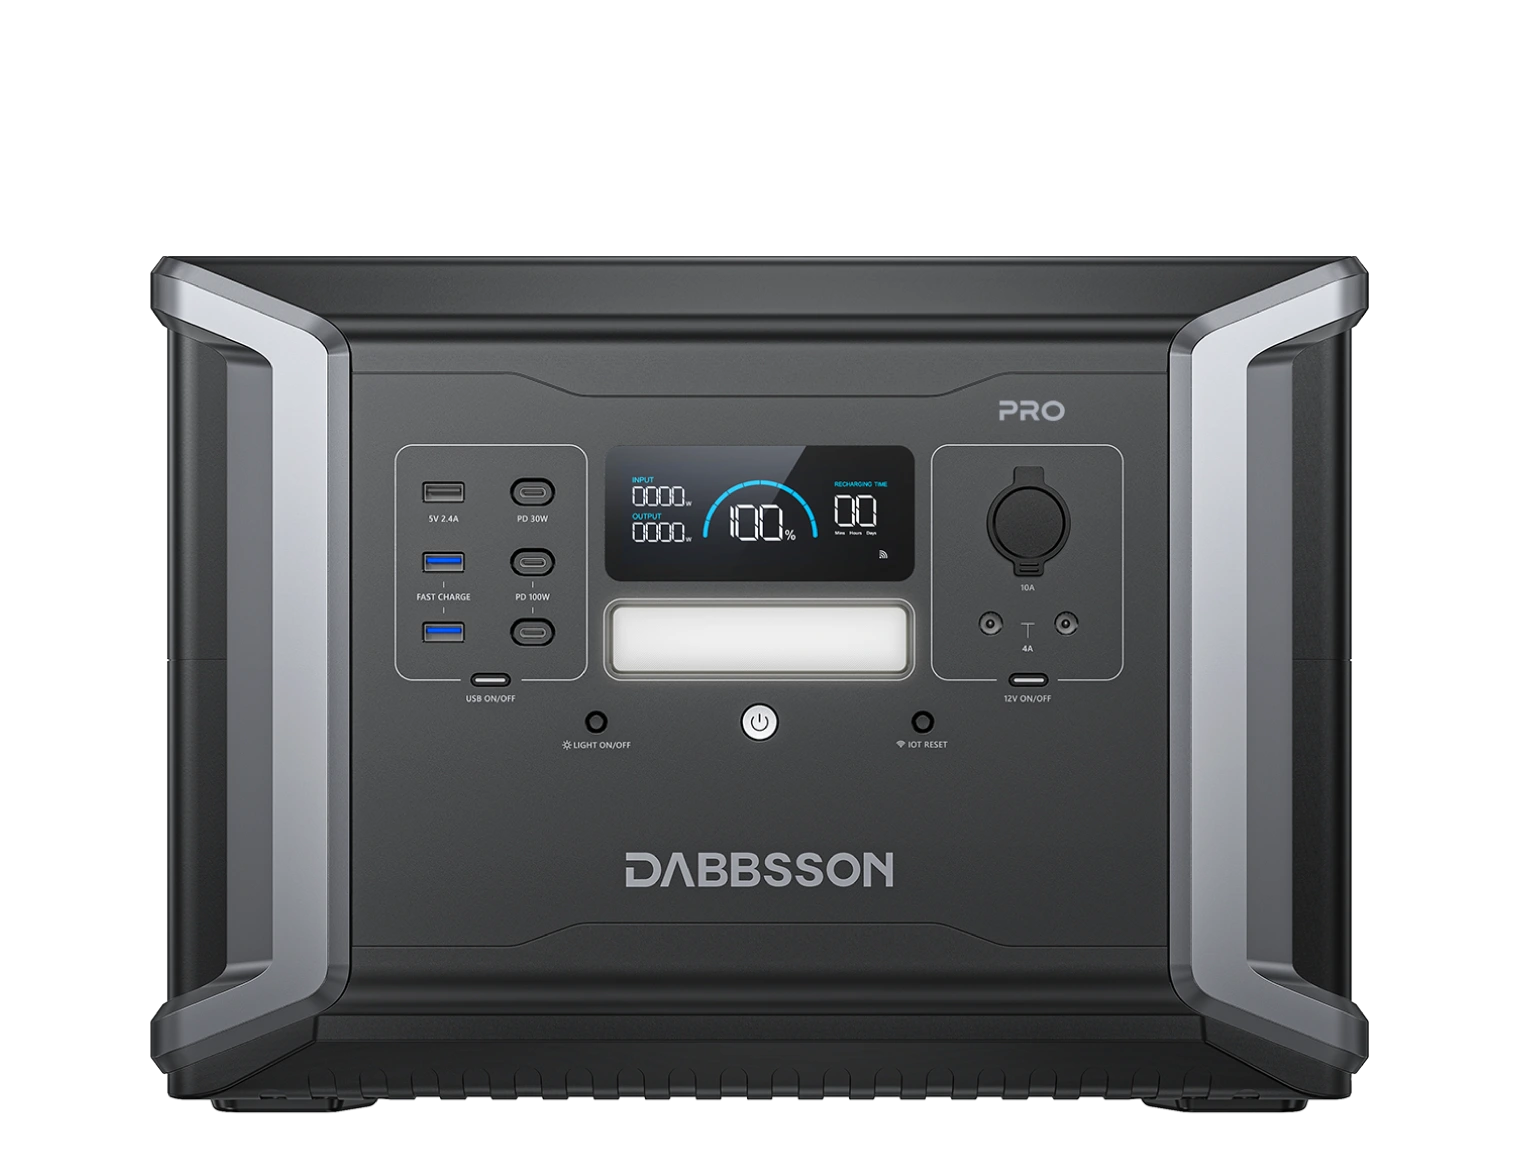
Multiple Outputs for All Your Needs
Equipped with multiple output ports, 2000L can power several electronic devices simultaneously. From smartphones and laptops to cameras and lights, it provides power to a variety of equipment at the same time, making it convenient and reliable for outdoor activities or emergencies.
Specs
General
Battery
Input
Output
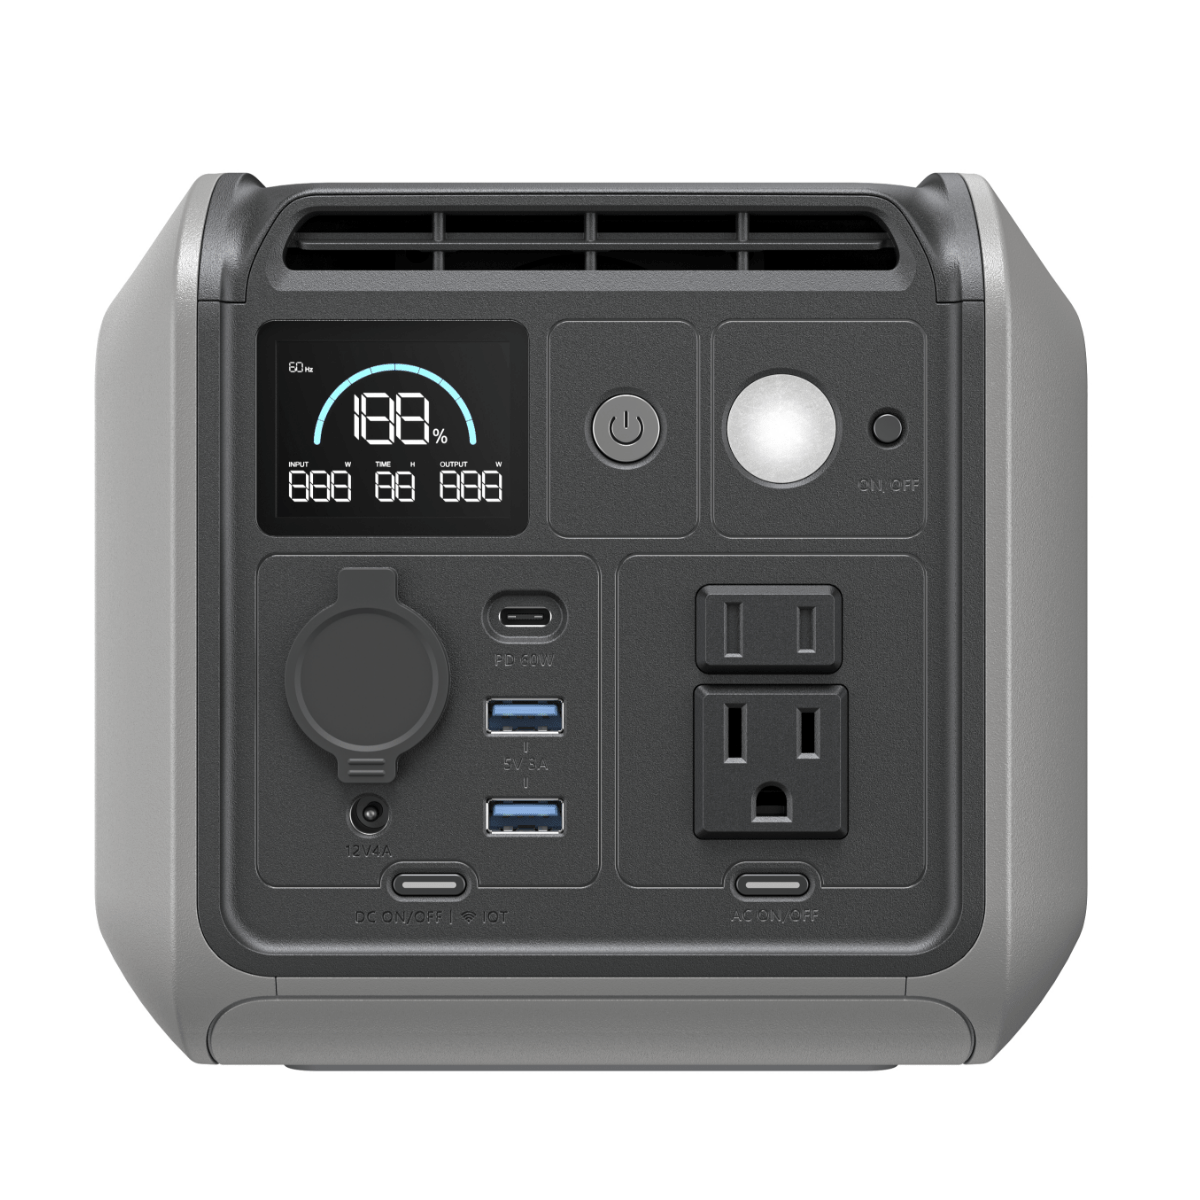
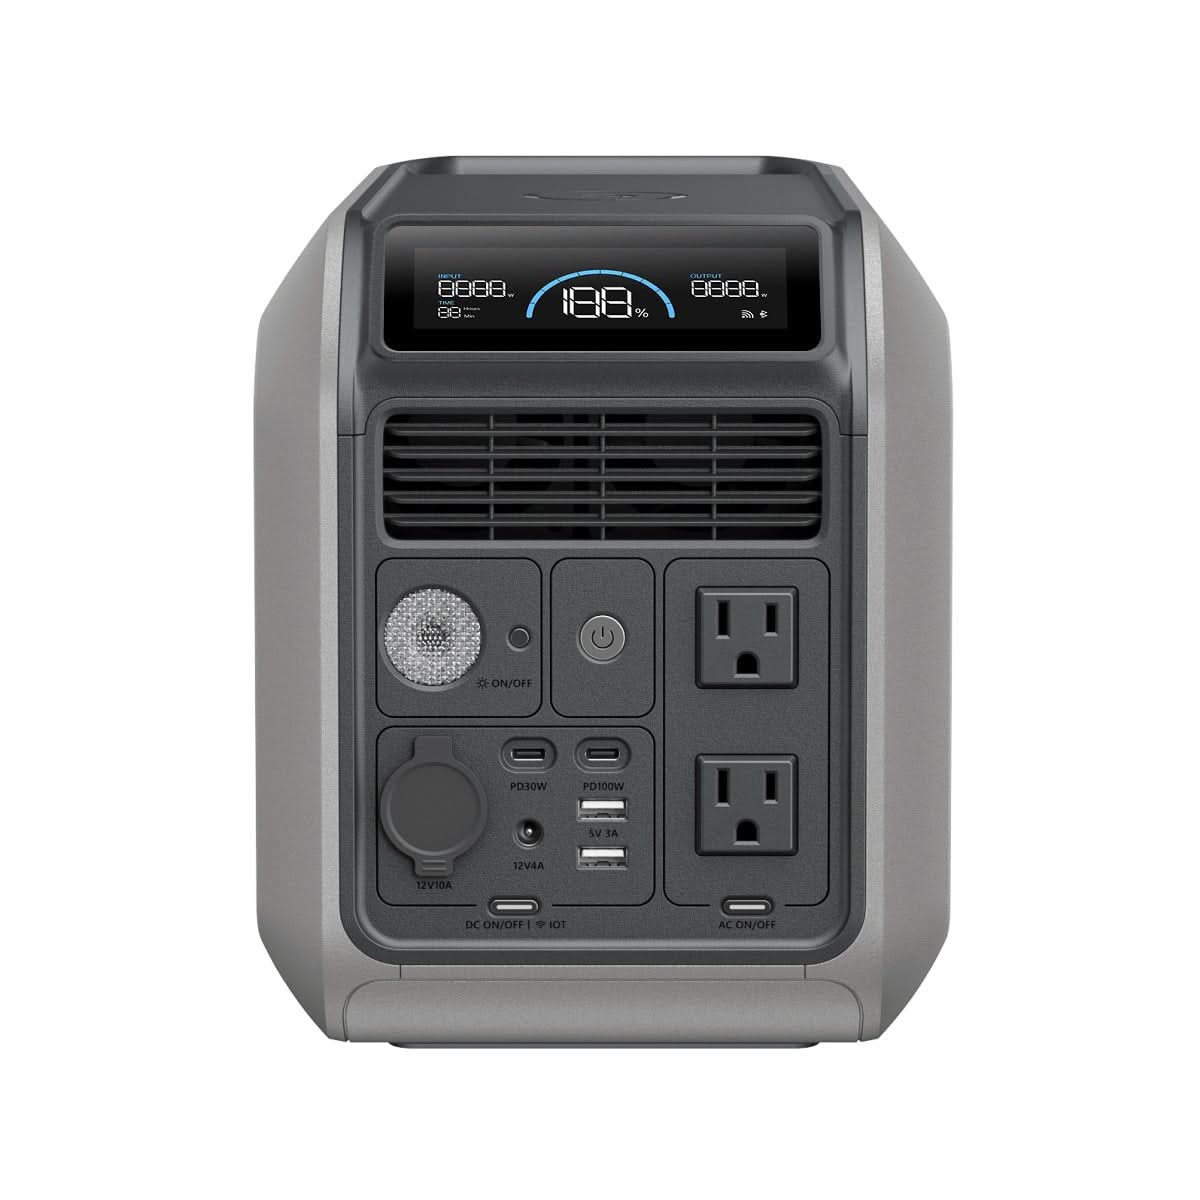
Which Portable Power Station is Best for You?


Battery
-
Capacity
2048Wh
-
Capacity
1008Wh
-
Capacity
768Wh
-
Capacity
1024Wh
-
Capacity
1330Wh/1200W
-
Capacity
1382Wh
-
Capacity
2150Wh
-
Capacity
2330Wh
-
Capacity
298Wh
-
Capacity
3430Wh
-
Capacity
2048Wh
-
Capacity
1008Wh
-
Capacity
768Wh
-
Capacity
1024Wh
-
Capacity
1330Wh/1200W
-
Capacity
1382Wh
-
Capacity
2150Wh
-
Capacity
2330Wh
-
Capacity
298Wh
-
Capacity
3430Wh
-
Capacity
2048Wh
-
Capacity
1008Wh
-
Capacity
768Wh
-
Capacity
1024Wh
-
Capacity
1330Wh/1200W
-
Capacity
1382Wh
-
Capacity
2150Wh
-
Capacity
2330Wh
-
Capacity
298Wh
-
Capacity
3430Wh
-
Expandable Capacity
No
-
Expandable Capacity
No
-
Expandable Capacity
No
-
Expandable Capacity
1024Wh-10000Wh
-
Expandable Capacity
1330Wh-9460Wh
-
Expandable Capacity
1382Wh-11364Wh
-
Expandable Capacity
2150Wh-12900Wh
-
Expandable Capacity
2330Wh-16660Wh
-
Expandable Capacity
No
-
Expandable Capacity
3430Wh-28140Wh
-
Expandable Capacity
No
-
Expandable Capacity
No
-
Expandable Capacity
No
-
Expandable Capacity
1024Wh-10000Wh
-
Expandable Capacity
1330Wh-9460Wh
-
Expandable Capacity
1382Wh-11364Wh
-
Expandable Capacity
2150Wh-12900Wh
-
Expandable Capacity
2330Wh-16660Wh
-
Expandable Capacity
No
-
Expandable Capacity
3430Wh-28140Wh
-
Power
2200W (Surge 4400W),
-
Power
1200W(Surge 2400W)
-
Power
600W(Surge 1200W)
-
Power
2000W (Surge 4000W)
-
Power
1200W(Surge 2400W)
-
Power
2400W (Surge 4800W)
-
Power
2400W (Surge 4800W)
-
Power
2200W (Surge 4400W)
-
Power
300W(Surge 600W)
-
Power
3600W (Surge 7200W)
-
Power
2200W (Surge 4400W),
-
Power
1200W(Surge 2400W)
-
Power
600W(Surge 1200W)
-
Power
2000W (Surge 4000W)
-
Power
1200W(Surge 2400W)
-
Power
2400W (Surge 4800W)
-
Power
2400W (Surge 4800W)
-
Power
2200W (Surge 4400W)
-
Power
300W(Surge 600W)
-
Power
3600W (Surge 7200W)
-
Power
2200W (Surge 4400W),
-
Power
1200W(Surge 2400W)
-
Power
600W(Surge 1200W)
-
Power
2000W (Surge 4000W)
-
Power
1200W(Surge 2400W)
-
Power
2400W (Surge 4800W)
-
Power
2400W (Surge 4800W)
-
Power
2200W (Surge 4400W)
-
Power
300W(Surge 600W)
-
Power
3600W (Surge 7200W)
-
Solar Input
12-60V 25A Max, 800W
-
Solar Input
12-60V 21A Max, 600W
-
Solar Input
12-30V 13A Max, 200W
-
Solar Input
12-60V 25A Max, 1200W
-
Solar Input
12-60V 12A Max, 400W
-
Solar Input
12-60V 25A Max, 1200W
-
Solar Input
12-60V 25A Max, 1200W
-
Solar Input
12-60V 25A Max, 800W
-
Solar Input
12-30V 6A Max, 120W
-
Solar Input
12-150V 25A Max, 2400W
-
Solar Input
12-60V 25A Max, 800W
-
Solar Input
12-60V 21A Max, 600W
-
Solar Input
12-30V 13A Max, 200W
-
Solar Input
12-60V 25A Max, 1200W
-
Solar Input
12-60V 12A Max, 400W
-
Solar Input
12-60V 25A Max, 1200W
-
Solar Input
12-60V 25A Max, 1200W
-
Solar Input
12-60V 25A Max, 800W
-
Solar Input
12-30V 6A Max, 120W
-
Solar Input
12-150V 25A Max, 2400W
-
Weight
41 lbs/18.60kg
-
Weight
24 lbs/10.89Kg
-
Weight
17.6 lbs/7.98Kg
-
Weight
34.39lb/15.6kg
-
Weight
36lb/16.3kg
-
Weight
45lb/20.5kg
-
Weight
54lb/24.5kg
-
Weight
58.15lb/26.38kg
-
Weight
9.4 lbs/4.26Kg
-
Weight
90.5lb/41kg
-
Weight
41 lbs/18.60kg
-
Weight
24 lbs/10.89Kg
-
Weight
17.6 lbs/7.98Kg
-
Weight
34.39lb/15.6kg
-
Weight
36lb/16.3kg
-
Weight
45lb/20.5kg
-
Weight
54lb/24.5kg
-
Weight
58.15lb/26.38kg
-
Weight
9.4 lbs/4.26Kg
-
Weight
90.5lb/41kg
-
Weight
41 lbs/18.60kg
-
Weight
24 lbs/10.89Kg
-
Weight
17.6 lbs/7.98Kg
-
Weight
34.39lb/15.6kg
-
Weight
36lb/16.3kg
-
Weight
45lb/20.5kg
-
Weight
54lb/24.5kg
-
Weight
58.15lb/26.38kg
-
Weight
9.4 lbs/4.26Kg
-
Weight
90.5lb/41kg
-
Lifecycle
4000 cycles to 80% capacity
-
Lifecycle
4000 cycles to 80% capacity
-
Lifecycle
4000 cycles to 80% capacity
-
Lifecycle
4000 cycles to 80% capacity
-
Lifecycle
4500 cycles to 80% capacity
-
Weight
45lb/20.5kg
-
Lifecycle
4500 cycles to 80% capacity
-
Lifecycle
4500 cycles to 80% capacity
-
Lifecycle
4000 cycles to 80% capacity
-
Lifecycle
4500 cycles to 80% capacity
-
Lifecycle
4000 cycles to 80% capacity
-
Lifecycle
4000 cycles to 80% capacity
-
Lifecycle
4000 cycles to 80% capacity
-
Lifecycle
4000 cycles to 80% capacity
-
Lifecycle
4500 cycles to 80% capacity
-
Weight
45lb/20.5kg
-
Lifecycle
4500 cycles to 80% capacity
-
Lifecycle
4500 cycles to 80% capacity
-
Lifecycle
4000 cycles to 80% capacity
-
Lifecycle
4500 cycles to 80% capacity
-
DabShield System
(Tested in nail penetration test, and 56 extreme environments)
-
DabShield System
(Tested in nail penetration test, and 56 extreme environments)
-
DabShield System
(Tested in nail penetration test, and 56 extreme environments)
Output
-
Semi-Solid LiFePO4 Battery
(Same battery used in high-end EVs) -
Number of Output Ports
13
-
Number of Output Ports
14
-
Number of Output Ports
13
-
Semi-Solid LiFePO4 Battery
(Same battery used in high-end EVs) -
Number of Output Ports
13
-
Number of Output Ports
13
-
Number of Output Ports
13
-
Number of Output Ports
14
-
Number of Output Ports
16
-
Semi-Solid LiFePO4 Battery
(Same battery used in high-end EVs) -
Number of Output Ports
13
-
Number of Output Ports
14
-
Number of Output Ports
13
-
Semi-Solid LiFePO4 Battery
(Same battery used in high-end EVs) -
Number of Output Ports
13
-
Number of Output Ports
13
-
Number of Output Ports
13
-
Number of Output Ports
14
-
Number of Output Ports
16
-
80% capacity after 4500 cycles
(15 years of use) -
AC Output
3+1 Nema TT-30 outlet, 2400W total
Surge 4800W
-
AC Output
5 outlets, 2200W total
Surge 4400W
-
AC Output
3+1 Nema TT-30 outlet, 2400W total
Surge 4800W
-
80% capacity after 4500 cycles
(15 years of use) -
AC Output
3+1 Nema TT-30 outlet, 2400W total
Surge 4800W
-
AC Output
4 outlets, 2000W total
Surge 4000W
-
AC Output
4 outlets, 1200W total
Surge 2400W
-
AC Output
4 outlets, 2200W total
Surge 4400W
-
AC Output
4+1 Nema TT-30 outlet, 3600W total
Surge 7200W
-
80% capacity after 4500 cycles
(15 years of use) -
AC Output
3+1 Nema TT-30 outlet, 2400W total
Surge 4800W
-
AC Output
5 outlets, 2200W total
Surge 4400W
-
AC Output
3+1 Nema TT-30 outlet, 2400W total
Surge 4800W
-
80% capacity after 4500 cycles
(15 years of use) -
AC Output
3+1 Nema TT-30 outlet, 2400W total
Surge 4800W
-
AC Output
4 outlets, 2000W total
Surge 4000W
-
AC Output
4 outlets, 1200W total
Surge 2400W
-
AC Output
4 outlets, 2200W total
Surge 4400W
-
AC Output
4+1 Nema TT-30 outlet, 3600W total
Surge 7200W
-
15 ms
-
Power Boost Mode
3600W
-
Power Boost Mode
3000W
-
Power Boost Mode
3600W
-
15 ms
-
Power Boost Mode
3600W
-
Power Boost Mode
3000W
-
Power Boost Mode
1600W
-
Power Boost Mode
3000W
-
Power Boost Mode
/
-
15 ms
-
Power Boost Mode
3600W
-
Power Boost Mode
3000W
-
Power Boost Mode
3600W
-
15 ms
-
Power Boost Mode
3600W
-
Power Boost Mode
3000W
-
Power Boost Mode
1600W
-
Power Boost Mode
3000W
-
Power Boost Mode
/
-
15 ms
-
Power Boost Mode
3600W
-
Power Boost Mode
3000W
-
Power Boost Mode
3600W
-
15 ms
-
Power Boost Mode
3600W
-
Power Boost Mode
3000W
-
Power Boost Mode
1600W
-
Power Boost Mode
3000W
-
Power Boost Mode
/
-
13
-
Max Add-on Output
4600W
DBS2100 Pro x2
-
Max Add-on Output
/
-
Max Add-on Output
4600W
DBS2100 Pro x2
-
13
-
Max Add-on Output
4600W
DBS1400 Pro x2
-
Max Add-on Output
4600W
DBS1000 Pro x2 + DBS2100B x2
-
Max Add-on Output
2300W
DBS1300 x2
-
Max Add-on Output
4200W
DBS2300 Plus x2
-
Max Add-on Output
240V, 7000W
DBS3500 x2
-
13
-
Max Add-on Output
4600W
DBS2100 Pro x2
-
Max Add-on Output
/
-
Max Add-on Output
4600W
DBS2100 Pro x2
-
13
-
Max Add-on Output
4600W
DBS1400 Pro x2
-
Max Add-on Output
4600W
DBS1000 Pro x2 + DBS2100B x2
-
Max Add-on Output
2300W
DBS1300 x2
-
Max Add-on Output
4200W
DBS2300 Plus x2
-
Max Add-on Output
240V, 7000W
DBS3500 x2
-
AC Outlet x3
NEMA TT-30 Outlet x1
2400W total (surge 4800W)
120V, 20A -
12W USB-A Port
1
-
12W USB-A Port
2
-
12W USB-A Port
1
-
AC Outlet x4
1200W total (surge 2400W)
120V -
12W USB-A Port
1
-
12W USB-A Port
1
-
12W USB-A Port
2
-
12W USB-A Port
2
-
12W USB-A Port
1
-
AC Outlet x3
NEMA TT-30 Outlet x1
2400W total (surge 4800W)
120V, 20A -
12W USB-A Port
1
-
12W USB-A Port
2
-
12W USB-A Port
1
-
AC Outlet x4
1200W total (surge 2400W)
120V -
12W USB-A Port
1
-
12W USB-A Port
1
-
12W USB-A Port
2
-
12W USB-A Port
2
-
12W USB-A Port
1
-
AC Outlet x3
NEMA TT-30 Outlet x1
2400W total (surge 4800W)
120V, 20A -
12W USB-A Port
1
-
12W USB-A Port
2
-
12W USB-A Port
1
-
AC Outlet x4
1200W total (surge 2400W)
120V -
12W USB-A Port
1
-
12W USB-A Port
1
-
12W USB-A Port
2
-
12W USB-A Port
2
-
12W USB-A Port
1
-
1
-
18W USB-A Port
2
-
18W USB-A Port
1
-
18W USB-A Port
2
-
2
-
18W USB-A Port
2
-
18W USB-A Port
2
-
18W USB-A Port
1
-
18W USB-A Port
1
-
18W USB-A Port
2
-
1
-
18W USB-A Port
2
-
18W USB-A Port
1
-
18W USB-A Port
2
-
2
-
18W USB-A Port
2
-
18W USB-A Port
2
-
18W USB-A Port
1
-
18W USB-A Port
1
-
18W USB-A Port
2
-
1
-
18W USB-A Port
2
-
18W USB-A Port
1
-
18W USB-A Port
2
-
2
-
18W USB-A Port
2
-
18W USB-A Port
2
-
18W USB-A Port
1
-
18W USB-A Port
1
-
18W USB-A Port
2
-
2
-
100W USB-C Port
2
-
100W USB-C Port
1
-
100W USB-C Port
2
-
1
-
100W USB-C Port
2
-
100W USB-C Port
2
-
100W USB-C Port
1
-
100W USB-C Port
1
-
100W USB-C Port
2
-
2
-
100W USB-C Port
2
-
100W USB-C Port
1
-
100W USB-C Port
2
-
1
-
100W USB-C Port
2
-
100W USB-C Port
2
-
100W USB-C Port
1
-
100W USB-C Port
1
-
100W USB-C Port
2
-
2
-
100W USB-C Port
2
-
100W USB-C Port
1
-
100W USB-C Port
2
-
1
-
100W USB-C Port
2
-
100W USB-C Port
2
-
100W USB-C Port
1
-
100W USB-C Port
1
-
100W USB-C Port
2
-
2
-
30W USB-C Port
1
-
30W USB-C Port
2
-
30W USB-C Port
1
-
1
-
30W USB-C Port
1
-
30W USB-C Port
1
-
30W USB-C Port
2
-
30W USB-C Port
2
-
30W USB-C Port
1
-
2
-
30W USB-C Port
1
-
30W USB-C Port
2
-
30W USB-C Port
1
-
1
-
30W USB-C Port
1
-
30W USB-C Port
1
-
30W USB-C Port
2
-
30W USB-C Port
2
-
30W USB-C Port
1
-
2
-
30W USB-C Port
1
-
30W USB-C Port
2
-
30W USB-C Port
1
-
1
-
30W USB-C Port
1
-
30W USB-C Port
1
-
30W USB-C Port
2
-
30W USB-C Port
2
-
30W USB-C Port
1
-
2
-
DC5521 Port
2
-
DC5521 Port
2
-
DC5521 Port
2
-
2
-
DC5521 Port
2
-
DC5521 Port
2
-
DC5521 Port
2
-
DC5521 Port
2
-
DC5521 Port
2
-
2
-
DC5521 Port
2
-
DC5521 Port
2
-
DC5521 Port
2
-
2
-
DC5521 Port
2
-
DC5521 Port
2
-
DC5521 Port
2
-
DC5521 Port
2
-
DC5521 Port
2
-
2
-
DC5521 Port
2
-
DC5521 Port
2
-
DC5521 Port
2
-
2
-
DC5521 Port
2
-
DC5521 Port
2
-
DC5521 Port
2
-
DC5521 Port
2
-
DC5521 Port
2
-
1
-
Car Power Outlet
1
-
Car Power Outlet
1
-
Car Power Outlet
1
-
1
-
Car Power Outlet
1
-
Car Power Outlet
1
-
Car Power Outlet
1
-
Car Power Outlet
1
-
Car Power Outlet
1
-
1
-
Car Power Outlet
1
-
Car Power Outlet
1
-
Car Power Outlet
1
-
1
-
Car Power Outlet
1
-
Car Power Outlet
1
-
Car Power Outlet
1
-
Car Power Outlet
1
-
Car Power Outlet
1
-
1
-
Car Power Outlet
1
-
Car Power Outlet
1
-
Car Power Outlet
1
-
1
-
Car Power Outlet
1
-
Car Power Outlet
1
-
Car Power Outlet
1
-
Car Power Outlet
1
-
Car Power Outlet
1
-
/
-
Anderson Port
/
-
Anderson Port
12.6V, 30A
-
Anderson Port
/
-
/
-
Anderson Port
/
-
Anderson Port
/
-
Anderson Port
/
-
Anderson Port
12.6V, 30A
-
Anderson Port
2, 12.6V, 30A ; 24V, 15A
-
/
-
Anderson Port
/
-
Anderson Port
12.6V, 30A
-
Anderson Port
/
-
/
-
Anderson Port
/
-
Anderson Port
/
-
Anderson Port
/
-
Anderson Port
12.6V, 30A
-
Anderson Port
2, 12.6V, 30A ; 24V, 15A
-
/
-
Anderson Port
/
-
Anderson Port
12.6V, 30A
-
Anderson Port
/
-
/
-
Anderson Port
/
-
Anderson Port
/
-
Anderson Port
/
-
Anderson Port
12.6V, 30A
-
Anderson Port
2, 12.6V, 30A ; 24V, 15A
-
DBS2000B/DBS2100B:
100W USB-C Port x2
18W USB-A Port x2 -
Expansion Battery Ports
DBS2000B/2100B:
100W USB-C Port x2
18W USB-A Port x2 -
Expansion Battery Ports
DBS3000B:
Anderson Port x2
12.6V, 25A ; 24V, 18A -
Expansion Battery Ports
DBS2000B/2100B:
100W USB-C Port x2
18W USB-A Port x2 -
DBS1700B: None
-
Expansion Battery Ports
DBS2000B/2100B:
100W USB-C Port x2
18W USB-A Port x2 -
Expansion Battery Ports
DBS2000B/2100B:
100W USB-C Port x2
18W USB-A Port x2 -
Expansion Battery Ports
DBS1700B:
/ -
Expansion Battery Ports
DBS3000B:
Anderson Port x2
12.6V, 25A ; 24V, 18A -
Expansion Battery Ports
DBS5300B:
/
-
DBS2000B/DBS2100B:
100W USB-C Port x2
18W USB-A Port x2 -
Expansion Battery Ports
DBS2000B/2100B:
100W USB-C Port x2
18W USB-A Port x2 -
Expansion Battery Ports
DBS3000B:
Anderson Port x2
12.6V, 25A ; 24V, 18A -
Expansion Battery Ports
DBS2000B/2100B:
100W USB-C Port x2
18W USB-A Port x2 -
DBS1700B: None
-
Expansion Battery Ports
DBS2000B/2100B:
100W USB-C Port x2
18W USB-A Port x2 -
Expansion Battery Ports
DBS2000B/2100B:
100W USB-C Port x2
18W USB-A Port x2 -
Expansion Battery Ports
DBS1700B:
/ -
Expansion Battery Ports
DBS3000B:
Anderson Port x2
12.6V, 25A ; 24V, 18A -
Expansion Battery Ports
DBS5300B:
/
Input
-
AC Charging Input
1800W
-
AC Charging Input
1800W Max
-
AC Charging Input
1800W
-
AC Charging Input
1800W
-
AC Charging Input
1200W Max
-
AC Charging Input
1000W Max
-
AC Charging Input
1800W Max
-
AC Charging Input
1800W Max
-
AC Charging Input
1800W
-
AC Charging Input
1800W Max
-
AC Charging Input
1800W
-
AC Charging Input
1800W
-
AC Charging Input
1200W Max
-
AC Charging Input
1000W Max
-
AC Charging Input
1800W Max
-
AC Charging Input
1800W Max
-
AC Charging Input
1800W
-
AC Charging Input
1800W Max
-
AC Charging Input
1800W
-
AC Charging Input
1800W
-
AC Charging Input
1200W Max
-
AC Charging Input
1000W Max
-
AC Charging Input
1800W Max
-
AC Charging Input
1800W Max
-
4
-
Solar Charge Input (XT60 Port)
1200W Max
12-60V, 25A
-
Solar Charge Input (XT60 Port)
600W Max
12-60V, 12A
-
Solar Charge Input (XT60 Port)
1200W Max
12-60V, 25A
-
3
-
Solar Charge Input (XT60 Port)
1200W Max
12-60V, 25A
-
Solar Charge Input (XT60 Port)
1200W Max
12-60V, 25A
-
Solar Charge Input (XT60 Port)
400W Max
12-60V, 12A
-
Solar Charge Input (XT60 Port)
800W Max
12-60V, 25A
-
Solar Charge Input (XT60 Port)
2400W Max
12-150V, 25A
-
1800W, 120V
0%-80% in 42 mins -
Car Charge Input
Supports 12V/24V Battery, Default 8A
-
Car Charge Input
Supports 12V/24V Battery, Default 8A
-
Car Charge Input
Supports 12V/24V Battery, Default 8A
-
1000W Max, 120V
0%-80% in 1 hour,
0%-100% in 1.72 hrs -
Car Charge Input
Supports 12V/24V Battery, Default 8A
-
Car Charge Input
Supports 12V/24V Battery, Default 8A
-
Car Charge Input
Supports 12V/24V Battery, Default 8A
-
Car Charge Input
Supports 12V/24V Battery, Default 8A
-
Car Charge Input
Supports 12V/24V Battery, Default 8A
-
1200W Max, 12-60V⎓25A
100% charged in 1.6 hrs -
AC+Solar Charging
2000W Max
-
AC+Solar Charging
1800W Max
-
AC+Solar Charging
2000W Max
-
400W Max, 12-60V⎓12A
100% charged in 4.4 hrs -
AC+Solar Charging
2400W Max
-
AC+Solar Charging
1200W Max
-
AC+Solar Charging
1400 Max
-
AC+Solar Charging
1800W Max
-
AC+Solar Charging
3400W Max
-
1200W Max, 12-60V⎓25A
100% charged in 1.6 hrs -
AC+Solar Charging
2000W Max
-
AC+Solar Charging
1800W Max
-
AC+Solar Charging
2000W Max
-
400W Max, 12-60V⎓12A
100% charged in 4.4 hrs -
AC+Solar Charging
2400W Max
-
AC+Solar Charging
1200W Max
-
AC+Solar Charging
1400 Max
-
AC+Solar Charging
1800W Max
-
AC+Solar Charging
3400W Max
General Info
-
Supports 12V/24V Battery, Default 8A
-
Net Weight
54 lb
-
Net Weight
56.8 lb
-
Net Weight
54 lb
-
Supports 12V/24V Battery, Default 8A
-
Net Weight
45 lb
-
Net Weight
34.39 lb
-
Net Weight
36.37 lb
-
Net Weight
56.8 lb
-
Net Weight
90.52 lb
-
Supports 12V/24V Battery, Default 8A
-
Net Weight
54 lb
-
Net Weight
56.8 lb
-
Net Weight
54 lb
-
Supports 12V/24V Battery, Default 8A
-
Net Weight
45 lb
-
Net Weight
34.39 lb
-
Net Weight
36.37 lb
-
Net Weight
56.8 lb
-
Net Weight
90.52 lb
-
Supports 12V/24V Battery, Default 8A
-
Net Weight
54 lb
-
Net Weight
56.8 lb
-
Net Weight
54 lb
-
Supports 12V/24V Battery, Default 8A
-
Net Weight
45 lb
-
Net Weight
34.39 lb
-
Net Weight
36.37 lb
-
Net Weight
56.8 lb
-
Net Weight
90.52 lb
-
2400W
AC 1800W + PV 600W
(80% charged in 32 mins) -
Dimensions (LxWxH)
17 x 10 x 11.9 in
-
Dimensions (LxWxH)
17 x 10 x 11.9 in
-
Dimensions (LxWxH)
17 x 10 x 11.9 in
-
1400W
AC1000W + PV 400W
(100% in 1.5hrs) -
Dimensions (LxWxH)
17 x 10 x 11.9 in
-
Dimensions (LxWxH)
17.01 x 10.02 x 9.98 in
-
Dimensions (LxWxH)
14.25 x 10.82 x 8.70 in
-
Dimensions (LxWxH)
17 x 10 x 11.9 in
-
Dimensions (LxWxH)
20.98 x 12.00 x 15.47 in
-
45 lb
-
Noise Level
30 dB
-
Noise Level
40 dB
-
Noise Level
30 dB
-
36 lb
-
Noise Level
30 dB
-
Noise Level
30 dB
-
Noise Level
40 dB
-
Noise Level
40 dB
-
Noise Level
40 dB
-
45 lb
-
Noise Level
30 dB
-
Noise Level
40 dB
-
Noise Level
30 dB
-
36 lb
-
Noise Level
30 dB
-
Noise Level
30 dB
-
Noise Level
40 dB
-
Noise Level
40 dB
-
Noise Level
40 dB
-
45 lb
-
Noise Level
30 dB
-
Noise Level
40 dB
-
Noise Level
30 dB
-
36 lb
-
Noise Level
30 dB
-
Noise Level
30 dB
-
Noise Level
40 dB
-
Noise Level
40 dB
-
Noise Level
40 dB
-
17 x 10 x 11.9 in
-
App
Supported
(Schedule Fuction) -
App
Supported
-
App
Supported
(Schedule Fuction) -
14.25 x 10.82 x 8.70 in
-
App
Supported
(Schedule Fuction) -
App
Supported
(Schedule Fuction) -
App
Supported
-
App
Supported
-
App
Supported
(Schedule Fuction)
-
17 x 10 x 11.9 in
-
App
Supported
(Schedule Fuction) -
App
Supported
-
App
Supported
(Schedule Fuction) -
14.25 x 10.82 x 8.70 in
-
App
Supported
(Schedule Fuction) -
App
Supported
(Schedule Fuction) -
App
Supported
-
App
Supported
-
App
Supported
(Schedule Fuction)
-
17 x 10 x 11.9 in
-
App
Supported
(Schedule Fuction) -
App
Supported
-
App
Supported
(Schedule Fuction) -
14.25 x 10.82 x 8.70 in
-
App
Supported
(Schedule Fuction) -
App
Supported
(Schedule Fuction) -
App
Supported
-
App
Supported
-
App
Supported
(Schedule Fuction)
-
30 dB
-
Operating Temperature
0℃~40℃ / 32°F~104°F
-
Operating Temperature
0℃~40℃ / 32°F~104°F
-
Operating Temperature
0℃~40℃ / 32°F~104°F
-
40 dB
-
Operating Temperature
0℃~40℃ / 32°F~104°F
-
Operating Temperature
0℃~40℃ / 32°F~104°F
-
Operating Temperature
0℃~40℃ / 32°F~104°F
-
Operating Temperature
0℃~40℃ / 32°F~104°F
-
Operating Temperature
0℃~40℃ / 32°F~104°F
-
Yes (schedule charging supported)
-
Warranty
5 Years
-
Warranty
5 Years
-
Warranty
5 Years
-
Yes
-
Warranty
5 Years
-
Warranty
5 Years
-
Warranty
5 Years
-
Warranty
5 Years
-
Warranty
5 Years
-
Yes (schedule charging supported)
-
Warranty
5 Years
-
Warranty
5 Years
-
Warranty
5 Years
-
Yes
-
Warranty
5 Years
-
Warranty
5 Years
-
Warranty
5 Years
-
Warranty
5 Years
-
Warranty
5 Years
-
Yes (schedule charging supported)
-
Warranty
5 Years
-
Warranty
5 Years
-
Warranty
5 Years
-
Yes
-
Warranty
5 Years
-
Warranty
5 Years
-
Warranty
5 Years
-
Warranty
5 Years
-
Warranty
5 Years
FAQ
Can 2000L charge and discharge at the same time?
Yes, it can.
What devices can the 2000L power?
The Dabbsson 2000L can power most appliances under 2200W.
Additionally, the Power-Boost function allows it to work with household appliances equipped with heating elements (such as insulation plates) rated at 3300W or lower, like small rice cookers and microwaves.
Does the fan noise change?
The fan runs to keep the battery cool and produces noise levels of 25–50dB (comparable to normal conversation or office noise). The volume depends on the output and input power, as well as the temperature of the battery storage system.
If left at full power for a long period of time, when will the battery level reach 0%?
When the unit is left unused after being fully charged, it can retain over 80% of its charge even after three months.
Note: Please make sure to turn off the power when not in use. If the power button is left on, internal components like the inverter may continue to operate and consume power. As a result, the battery level may decrease even if no devices are connected.
Can I charge 2000L with AC and solar power at the same time?
Yes, Dabbsson 2000L support AC and solar dual charging combined 1800W.
Can the 2000L charge my EV?
Yes, the Dabbsson DBS2000L can charge your Electric Vehicle(EV)by using an extra portable EV charger for around 12 miles.
How to use 2000L EPS Function?
When a power outage occurs, Dabbsson EPS automatically switches to battery power within 15ms to keep your appliance running.
Simply connect the Dabbsson power station to a wall outlet, then plug in the appliance you want to protect. Enable standby mode and set the power station's AC timeout to 'Never' in the Dabbsson App to ensure it's always on.
In this setup, the power station operates in pass-through mode, allowing grid power to flow through to the appliance. If the grid power fails, it seamlessly switches to battery power within 15ms to keep your protected appliances always on.
What's In the Box
2000L
AC Charging Cable

Car Charging Cable
User Manual

Warranty Card
2000L
AC Charging Cable
Car Charging Cable
User Manual
Warranty Card
This product has no reviews yet.